 Nothing like that classic arrowhead shape! The recent pandemic and subsequent quarantine period have emboldened me to take on some bigger and more intimidating projects. Not only have I been working on bigger models that have been sitting in my stash for a while, but I have also started doing some board game miniature painting. Look out for those posts soon! I guess staying home a lot gives you courage to do even more nerdy and introvert-friendly things... I have some big ideas to share a build diary of my progress through the biggest model I have ever attempted, the Perfect Grade Millennium Falcon, but first I have to share a few thoughts on this very high quality Star Destroyer model made by Bandai. 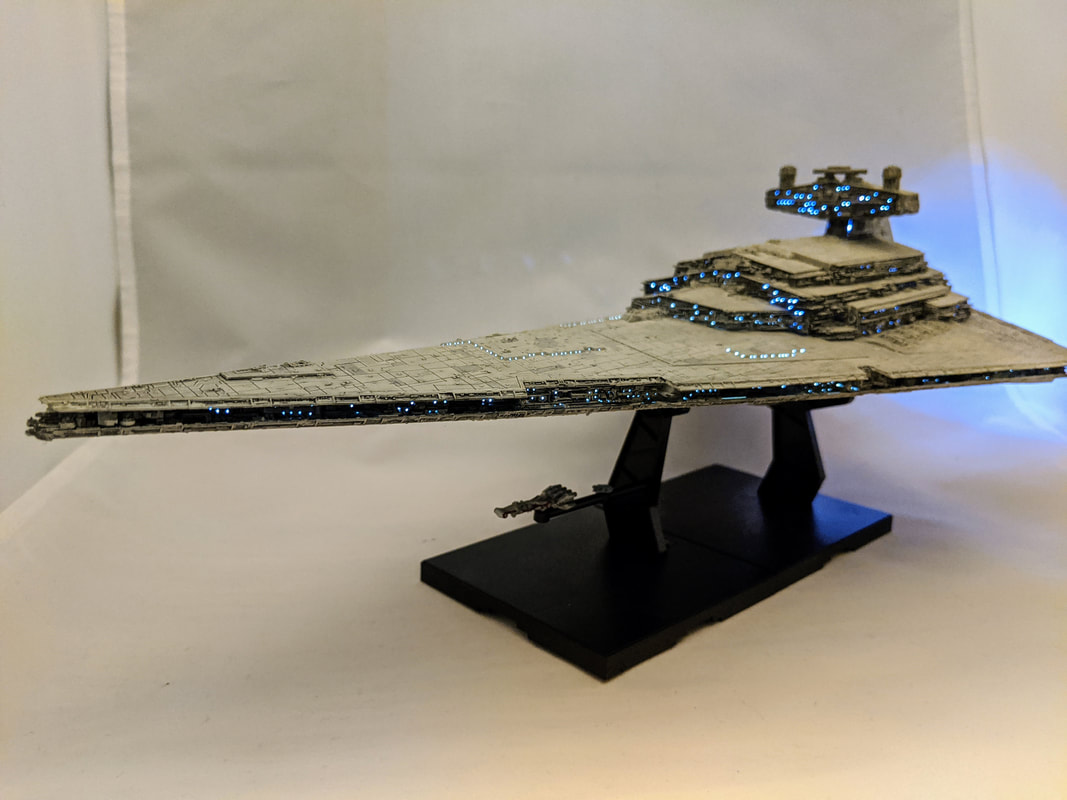 Such a simple design and so beautifully detailed. The first time I heard about the production of this kit was probably a little less than two years ago. I keep a regular eye out for any news of upcoming Star Wars model kits on multiple social media platforms, so I usually know things as soon as they drop. At first, I was unsure about whether I wanted to add this kit to my collection. It is about one foot long, and I wasn't sure about the space in my corner of the basement. Then, I went to Star Wars Celebration in April 2019 and saw a finished one in person and was immediately hooked. Despite being on the smaller side, the detail was not compromised, and the lights gave it that extra punch. 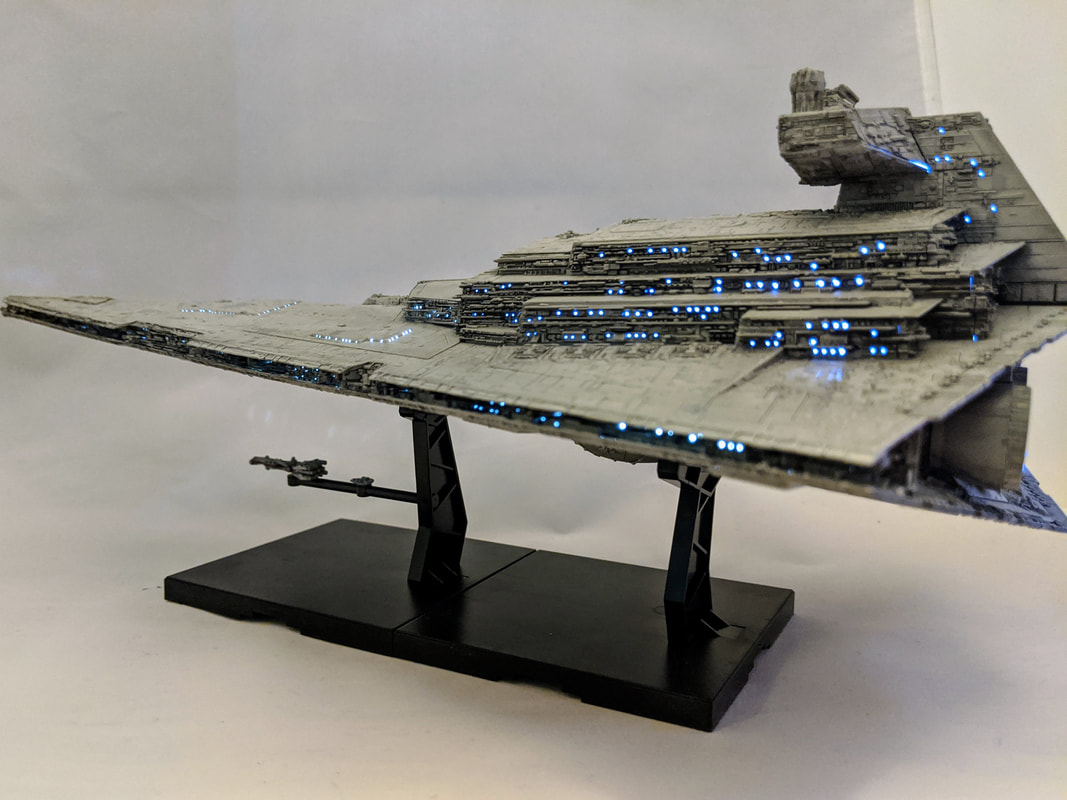 Look at all of those little details on the sidewalls! Spring 2020 arrives and I am stuck at home, so what better time than to bust open the Star Destroyer box. As you can see in the picture above, the kit comes with a Millennium Falcon and Tantive IV to scale, and they are tiny! I started by painting those, which was really just giving them a coat of paint and then adding some tiny markings on them with the smallest brush tip I have. I love the way they give scale to the size of the Star Destroyer. There are not a huge amount of pieces to this kit, as it is primarily the two main body pieces, the sidewalls, and the parts for the engines and the bridge tower. I did a little research on what other modelers had done with the kit and found out that I needed to do a little light blocking around a few seams on the main body and the bridge. I just used some aluminum tape to accomplish that. I also glued the top and bottom to the sidewalls because there was a little gap that I did not want light to shine through. 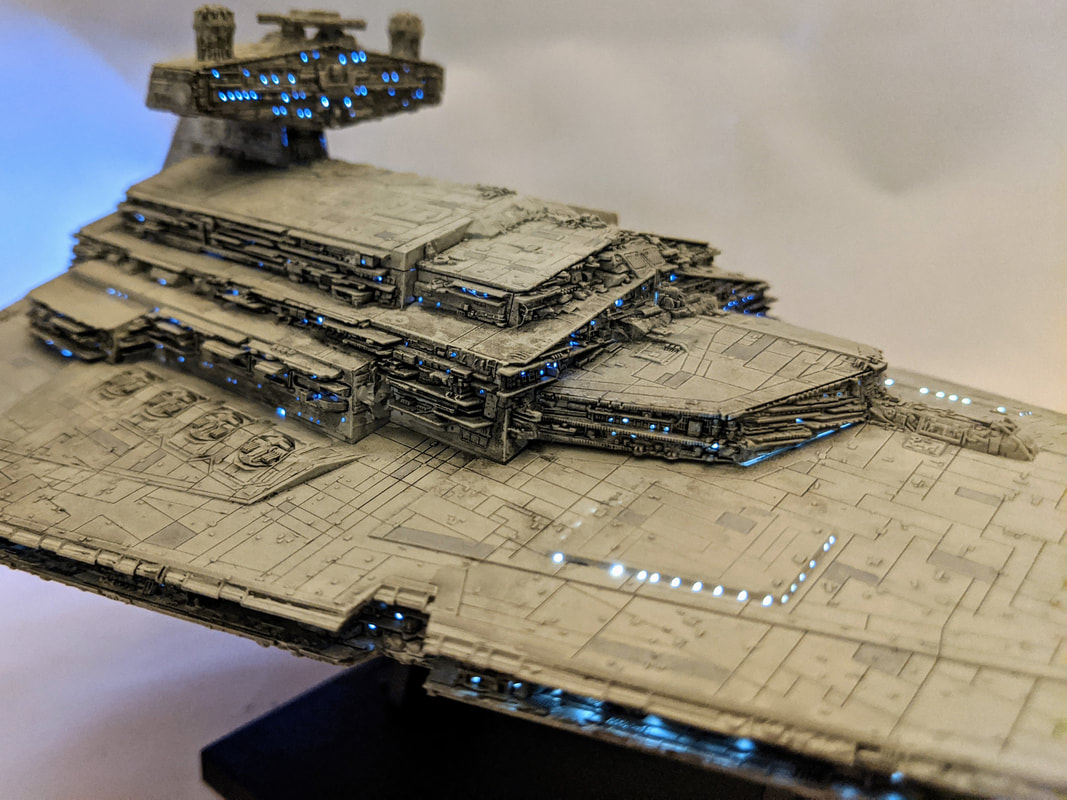 The bridge tower section, which is pictured above, has to be pulled off to reach the lightswitch, which is kind of a pain, but not something worth complaining about. Also, there is a white plastic piece that covers the battery box which I cut out a little to more easily reach the on/off switch. Unfortunately, I don't have pictures from my own work, but I found a few online that helped through the modifications. I used Tamiya AS16 Light grey as the base color and then hand painted in all the darker grey spots with Vallejo Air Light Gray. Finally, I finished off the kit with a dark gray wash to highlight all of the panel lines and help the sidewall details pop. 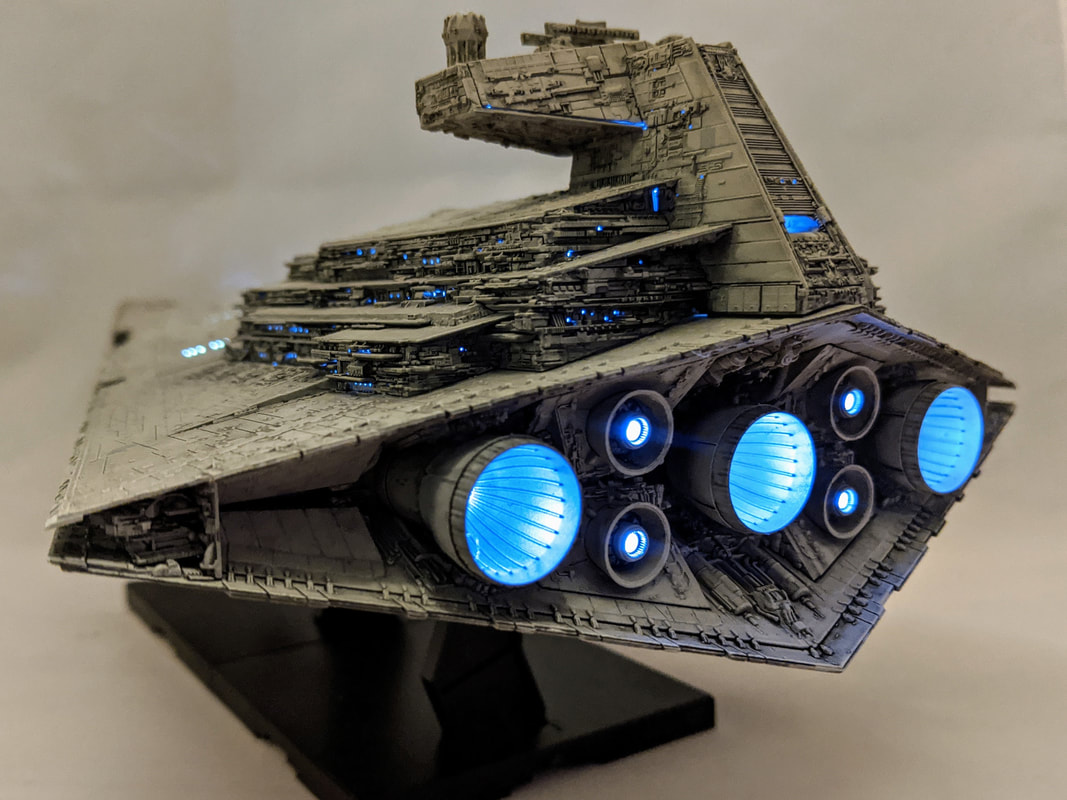 I am normally not into the time and expense of lighting my kits, but because lights came with this one, I went for it. I have to say that the lights turn this kit from great to amazing, and I am so glad I did the extra work. I was not able to fix all of the spots where light leaks, but I am happy with what I was able to do. Despite being a fairly simple kit, I feel this is a highlight of my collection. 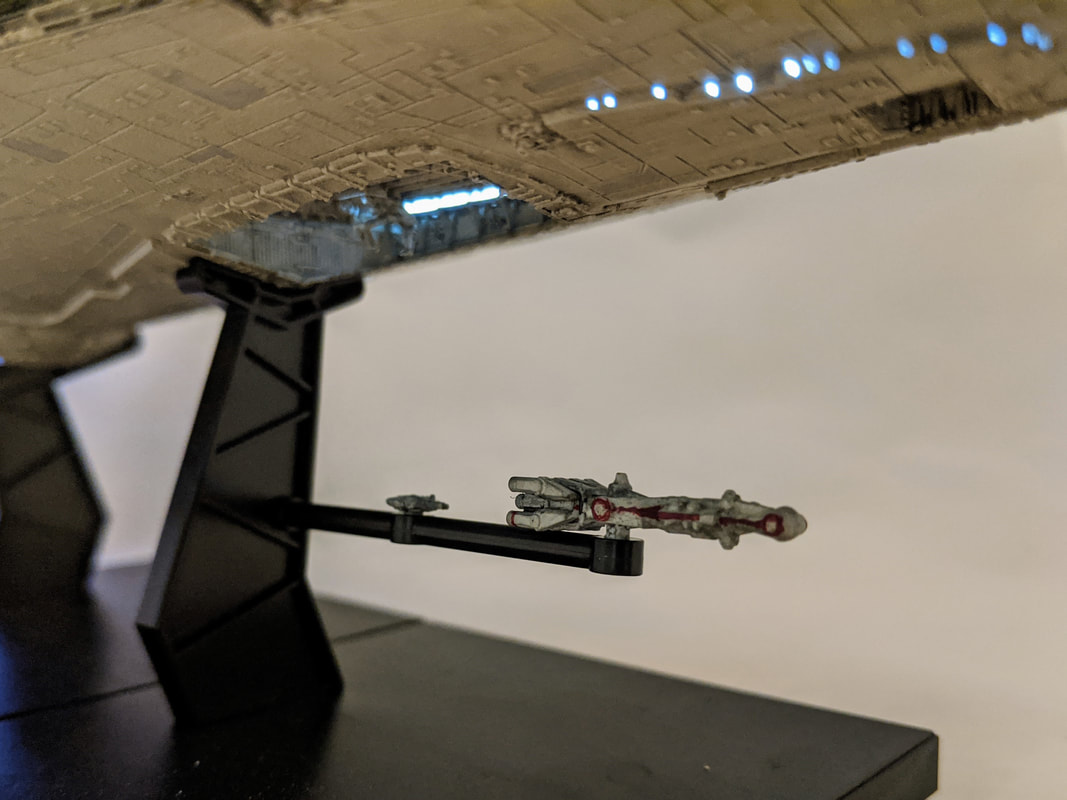 It's bad news for these Rebels...
1 Comment
If you followed my other page at all while I was counting down to the release of Rise of Skywalker, you probably know that I love X-Wings. A lot. As in, the amount of X-Wing paraphernalia in my house outnumbers the average person's shoe closet. I had been tracking Bandai's X-wing releases, and particularly their 1/48 scale classic Red 5 X-Wing with lights and sound effects, for a while, but it was prohibitively expensive until I caught it on a 50% off sale.  Overall, this kit was a great pleasure to build and the big scale allows for a lot of great detail, especially in the cockpit and engine parts. The added bonus of lights and sound effects makes for a great display model! I used a combination of paint and decals, as I often do with Bandai kits, with a base color of Vallejo Model Air White Gray. 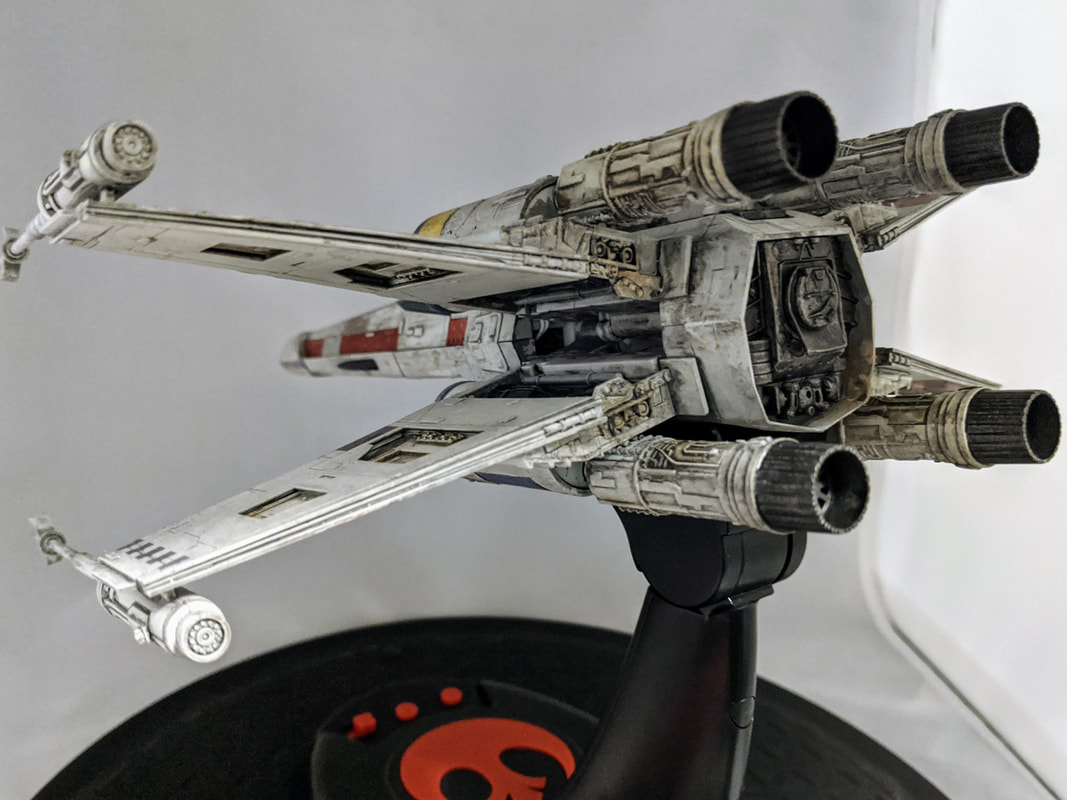 For the weathering I used a dark gray Vallejo wash and Oilbrushers for some of the engine rust. I ran into a scary problem when one of my matte clear coats fogged up most of the model. I had to spend some time wiping off the model with thinner, especially on R2-D2 and then giving it a gloss coat to help defrost the matte. I was able to work it out in the end, but I got very anxious for a while. 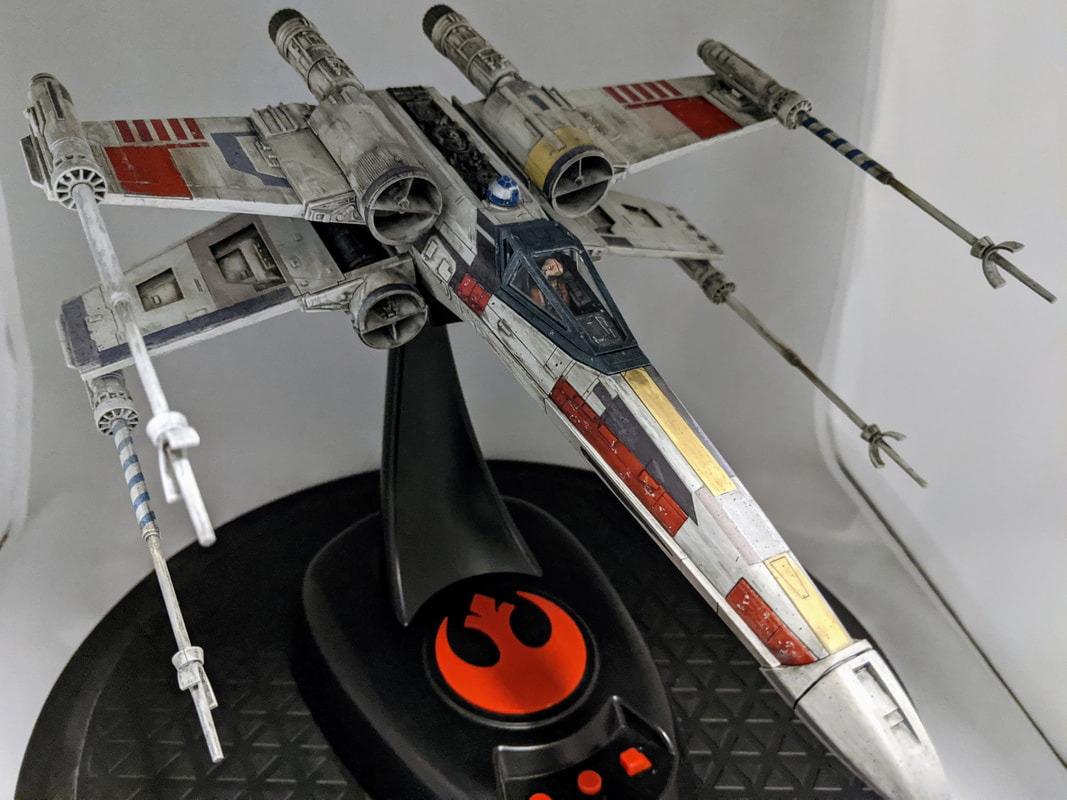 This kit is pretty hard to find these days, but if you can grab one, it is well worth the investment. Between its size and the bonus light and sound effects, this X-Wing will make a great shelf piece! 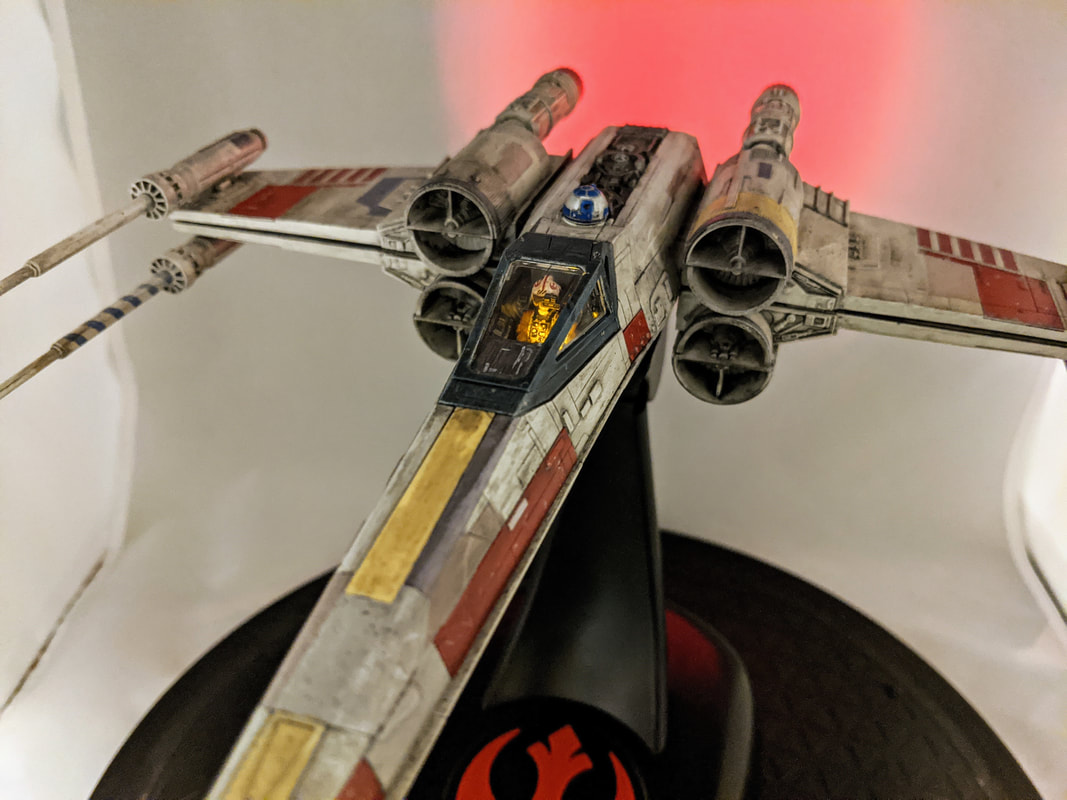 Even the cockpit has a little light inside! 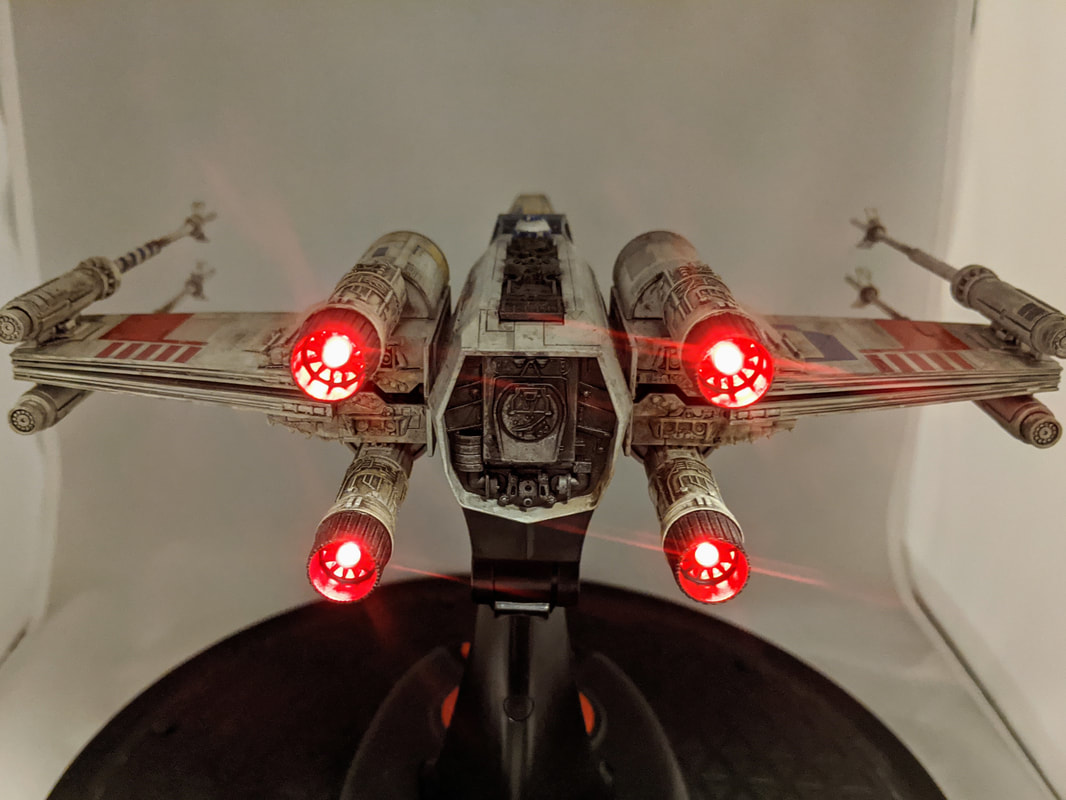 The rear engine lights look great. 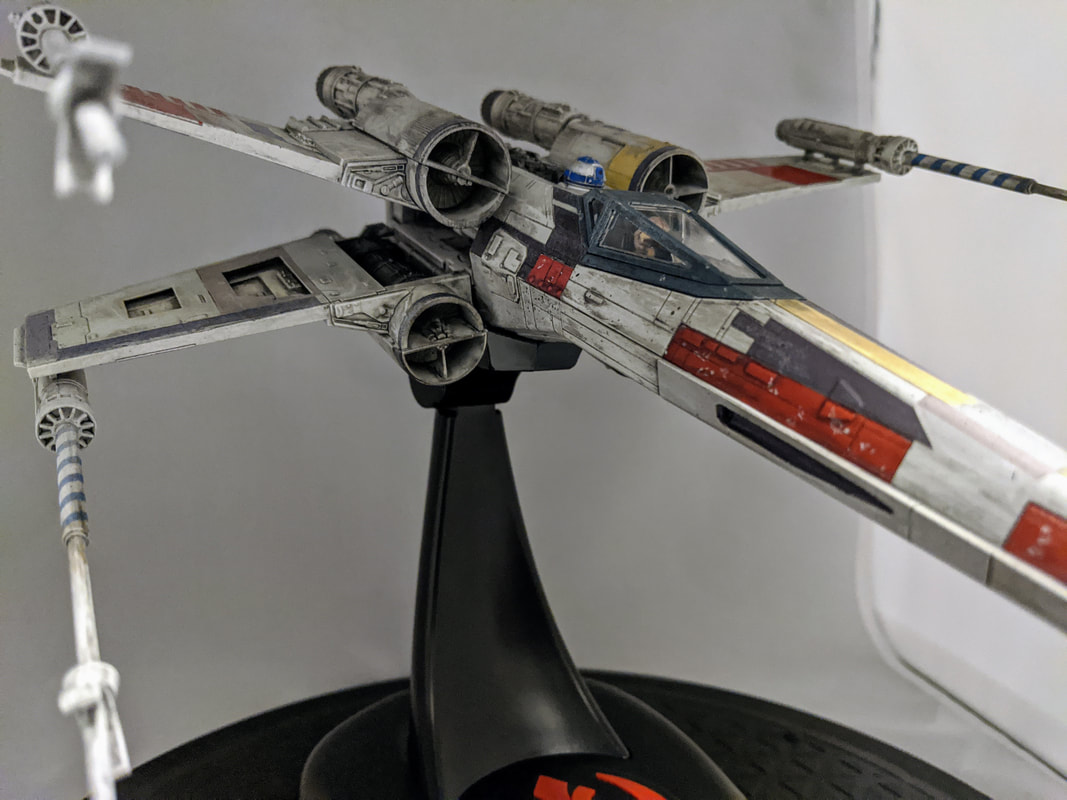 |
AuthorModel builder, board gamer, and all around lover of small scale stuff. Archives
March 2021
Categories
All
|
 RSS Feed