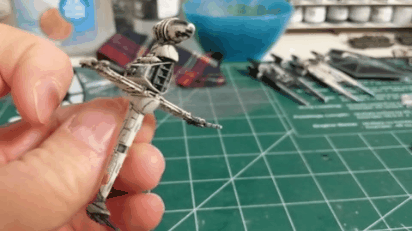
 Besides building Star Wars models, I am a huge fan of the X-Wing miniatures table top game. I am not into the tournament circuit, but I like collecting the ships and playing casually every couple of months. A while back I stumbled across some research about magnetizing your X-wing ships to create the ability to bank and turn your ship on the stand. The idea intrigued me, but I never made the commitment to doing it. For whatever reason, I decided about a month ago that it was time. The process was quite easy, and I will just direct you to the K&J Electronics tutorial where I both learned how to do it and bought all the magnets. I followed their instructions, but I used super glue instead of hot glue. Small Ships See this great tutorial from K&J Electronics. Here are a couple of additional thoughts. Note about the glue: Super glue worked well for attaching the magnets to the ships, but was much more difficult when attaching the steel ball to the plastic stand. I went through many frustrating attempts trying to hold the ball onto the stand with it sliding off and ruining the surface of the steel ball. I would recommend hot glue for the steel balls rather than super glue. Note about the bigger small ships: I did find that some of the small ships like the Sheathipede shuttle needed a slightly bigger steel ball to match the ship's weight. I used the 1/4" steel ball (NSB4) for these slightly bigger ships, and it worked perfectly. I would recommend making some small/medium ship plastic tube stands to use with your heavier small ships. 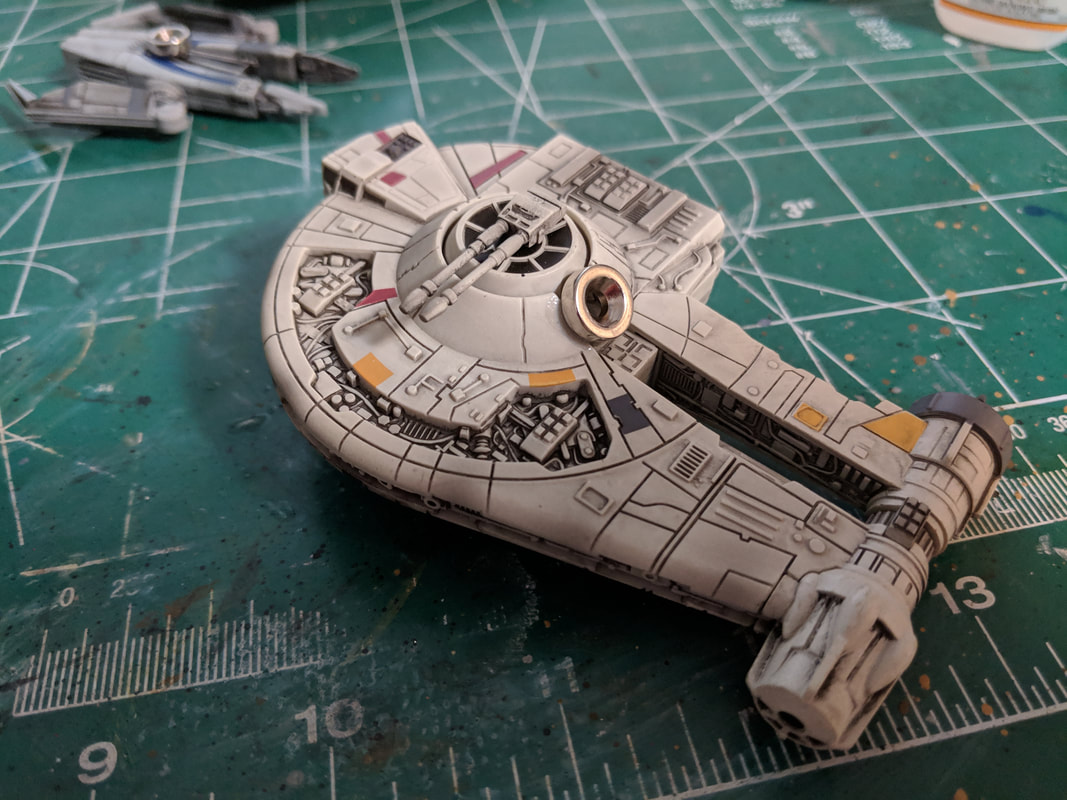 Some of the bigger ships required some creative magnet placement. Big Ships The tutorial linked above did not address much about the bigger ships beyond a suggestion about the size of ring magnets and steel balls. The size suggestion is perfect, although I would recommend making a few with the 3/8" countersunk ring magnet and the 1/2" diameter steel ball, which is one size bigger than K&J's initial recommendation. A few of the newer ships (I'm thinking mainly of the Shadowcaster) are heavier and need a little stronger support. The biggest challenge with some of the larger ships is the placement of the original stand connector. Above, you can see the YT-2400 required a magnet placed diagonally to maintain the weight balance of the ship when attached to the base. 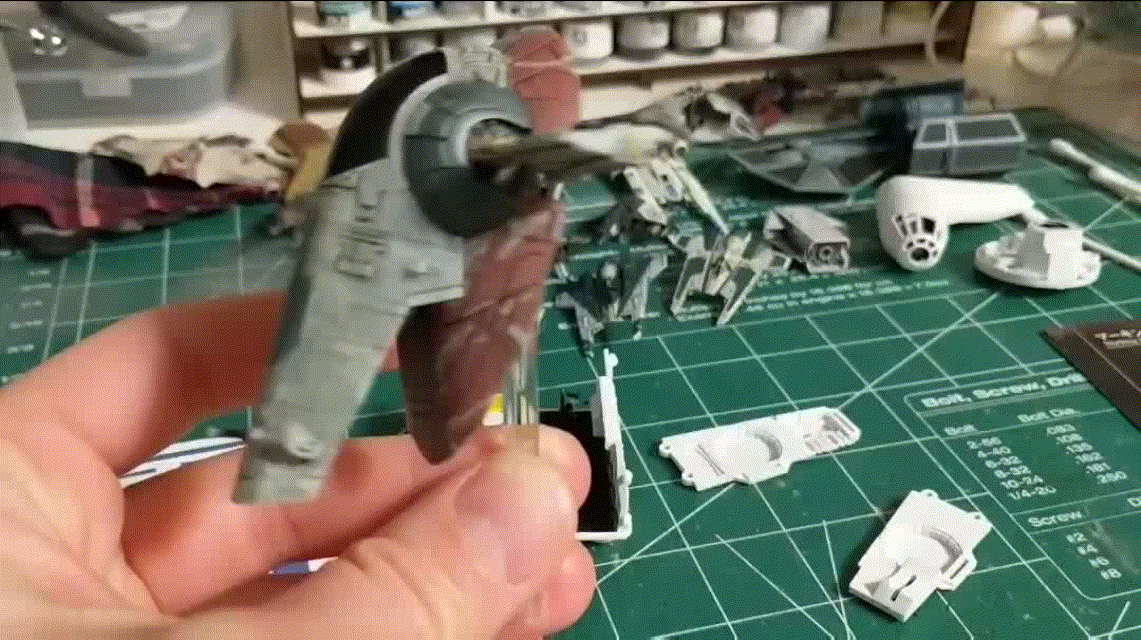 The other ship with which I faced the biggest challenge was the Slave 1. The original stand connector is placed up inside the ship so it can fly vertically, like in the films. The magnets were not going to fit there so I made the call to glue the magnet to the back. You can see the result above. The bonus of this placement is that you can rotate the ship into its landing position, if you feel so inclined.
I have yet to play a round with my magnetized ships, and I still have most of the scum ships to finish, but I really like the final result of the magnets, and I would highly recommend it to anyone who feels up to it. The process is not hard at all and looks to be visually rewarding. Feel free to leave any questions in the comments or share some tips of your own!
0 Comments
|
AuthorModel builder, board gamer, and all around lover of small scale stuff. Archives
March 2021
Categories
All
|
 RSS Feed