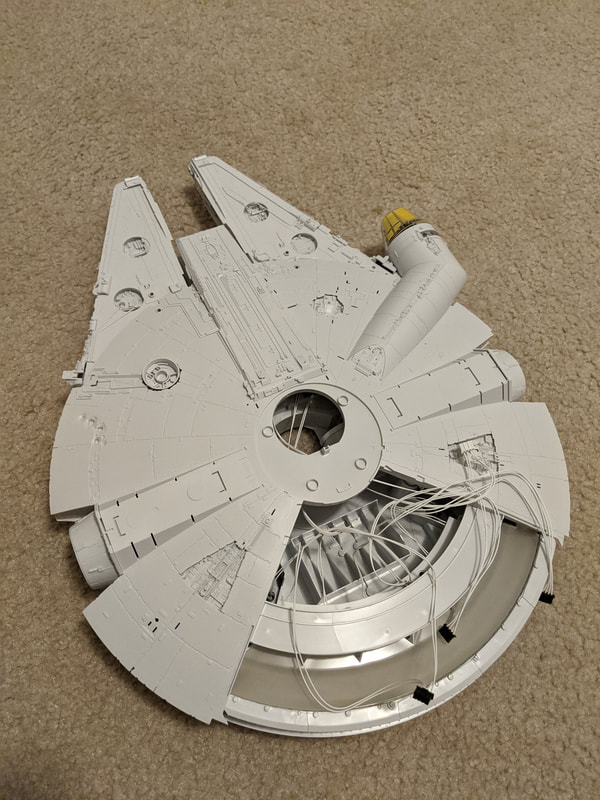
 So many sub-assemblies build up to this beauty! First of all, the Millennium Falcon is still sitting on the bench and still getting some love now and then, but life has most definitely slowed a lot of hobby time to a major halt. So, five months after my first build diary entry, here is the second part, which focuses on the smaller sub-assemblies that come together to make the big ship seen above. Up first, the cockpit attaches to a sub-assembly of the hallway to the rest of the ship. The first set of lights attaches through here and then threads through the ship to the light control box at the back. 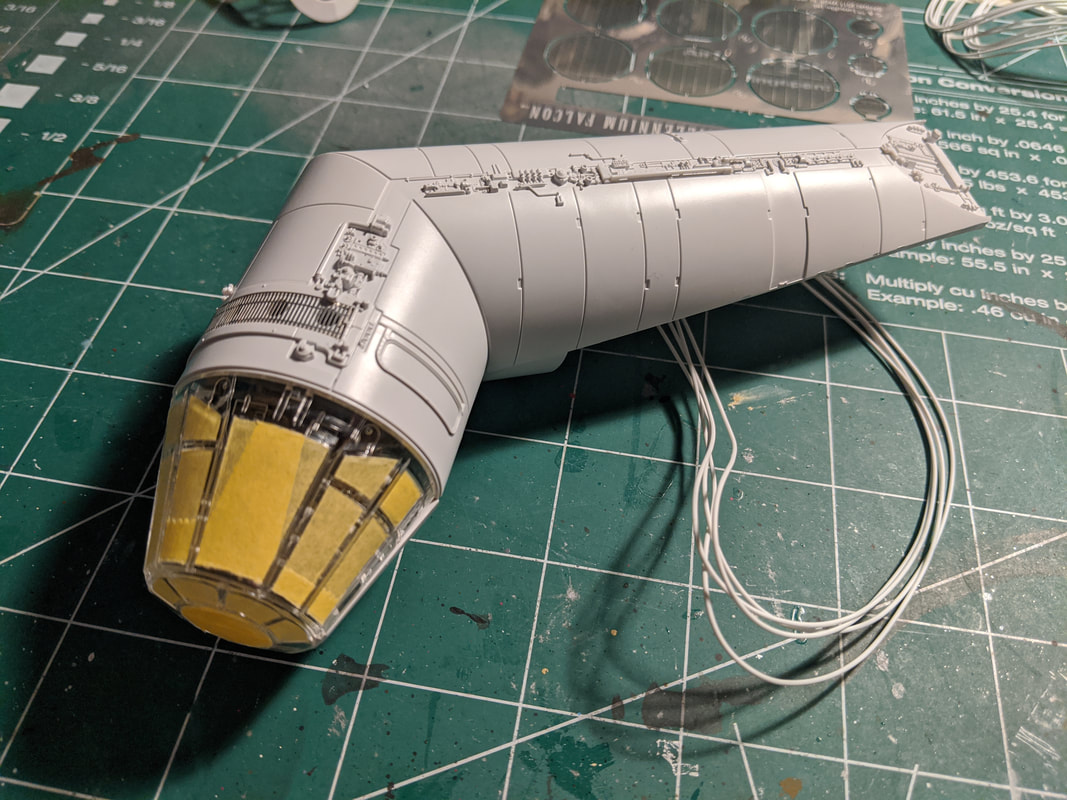 For now, I am using the clear cockpit to keep the inside paint in the cockpit protected from the rest of the paint job. The next part of the build was the front mandibles and their corresponding side walls. There were so many tiny parts to add on the sidewalls and in the exposed holes on the top and bottom side. 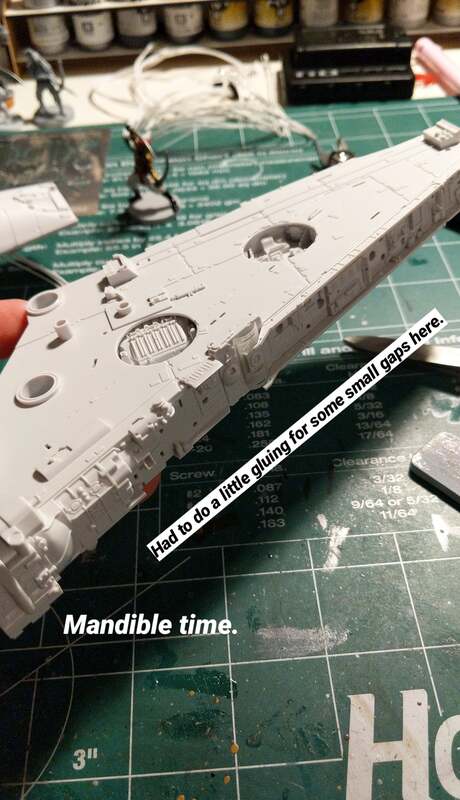 Most of the holes you see on the sidewalls here were filled by tiny, tiny parts. There was a small amount of gapping when the two halves were combined, but a little glue and clamping helped solve that problem. tAfter the mandibles came the bottom and top hull parts with all of the exposed inner parts as well. The mandibles fit well onto the bottom hull, and the fit between the top and bottom hull was surprisingly good. 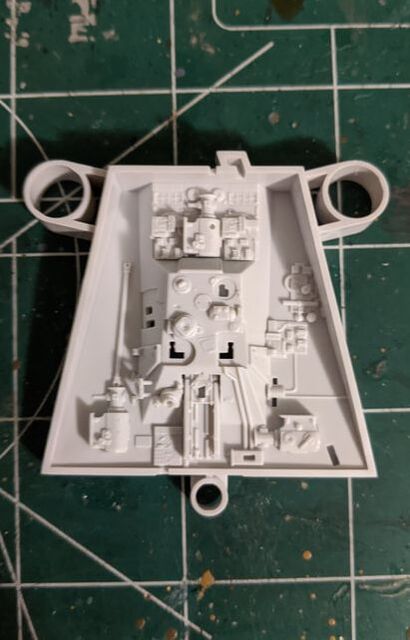 A little taste of the detail just from the exposed hull areas. A little taste of the detail just from the exposed hull areas. Finally, all the sub-assemblies came together to create a pretty good picture of the final size and look of the model. I decided to assemble most of the kit and then start the painting instead of painting each sub-assembly and work from there, but everyone prefers different methods, so a different choice might work better for someone else. Most of the assembly was fairly straightforward, but because of the level of detail on many of the sidewals and exposed hull parts, some of the tiniest parts definitely required a good pair of tweezers. I think I only broke two pieces total, and I was able to glue them back together once they were in place. 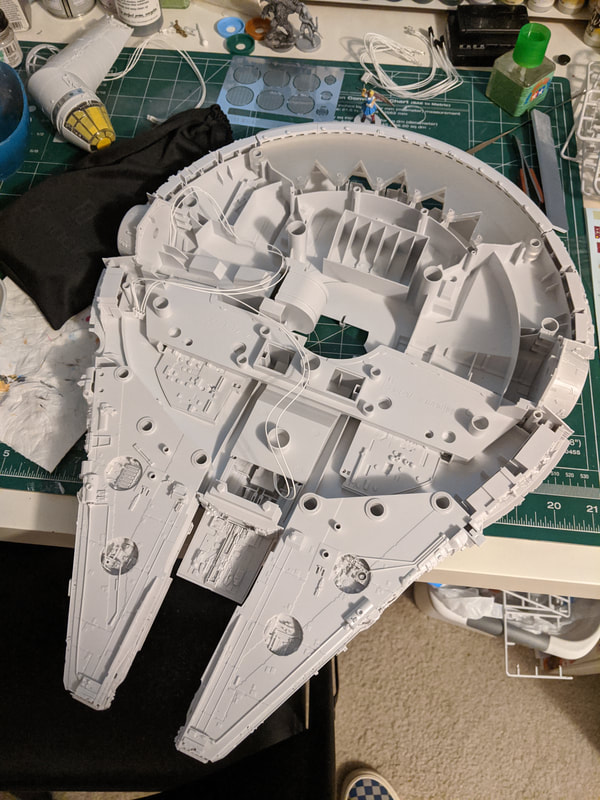 Overhead view of how the mandibles fit into the bottom hull parts and how some of the wiring fits in. For part III, coming sometime in the future, I will move onto priming and basecoating. Thanks for reading and following along!
8 Comments
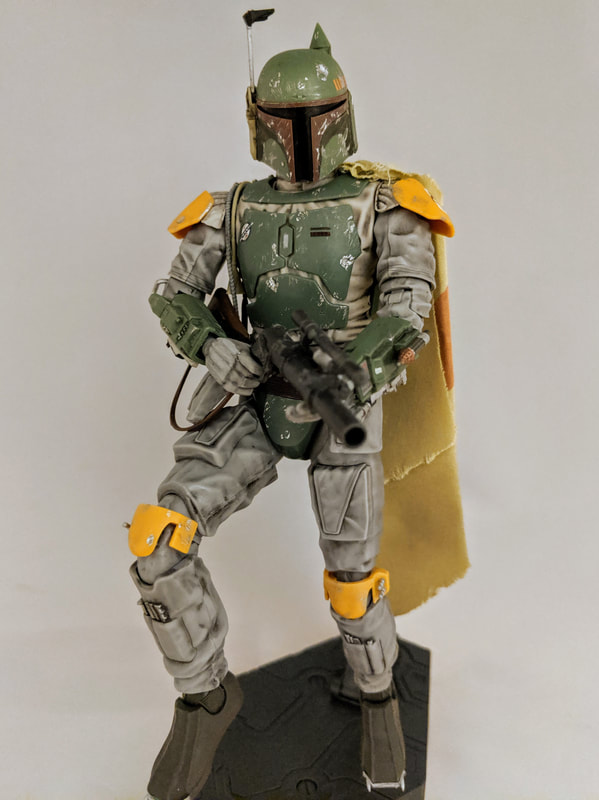
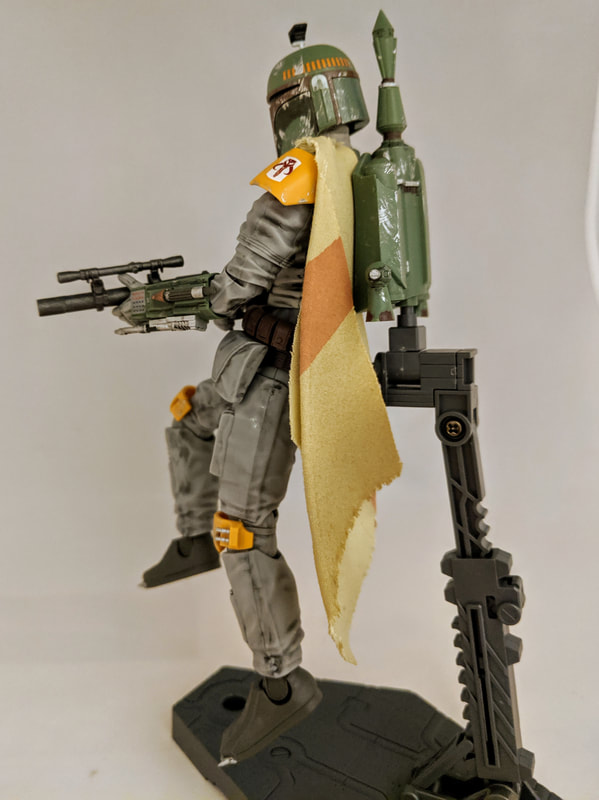
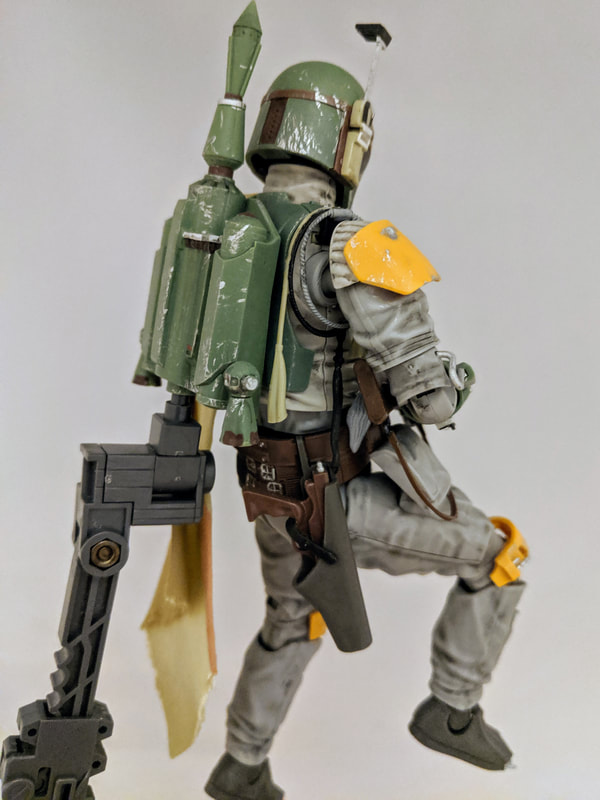
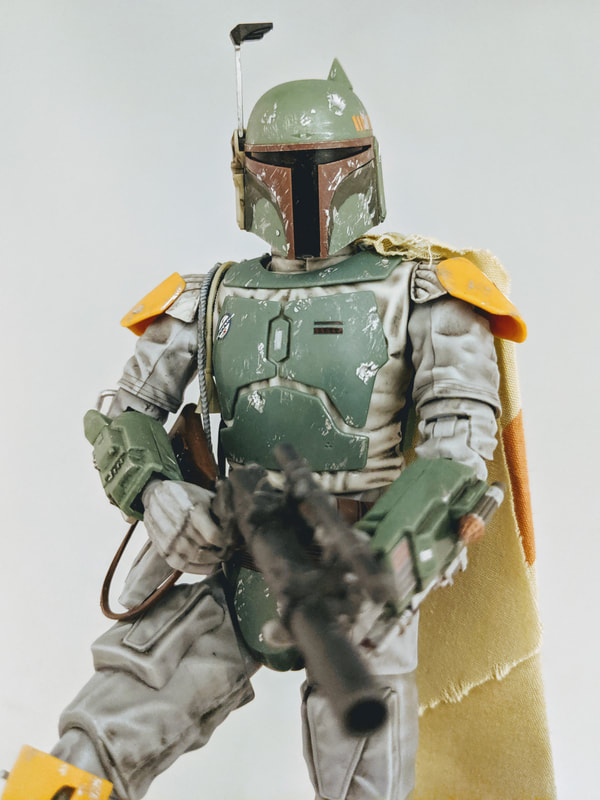
Over the summer, I began work on my biggest model project yet, the Perfect Grade Millennium Falcon made by Bandai. This kit is what those of us in the hobby call a "Grail" kit, as in the big, most desired kit of the most popular subject. Obviously, the Millennium Falcon is a character in itself and has countless model kits based on all the different versions from the different movies. This one, however, is the most detailed and biggest mass-produced kit you can buy of the Falcon. Based on the filming model from the original Star Wars, there are an insane amount of parts on this kit and the box is huge! After I got this kit, it sat in my garage for a long time. I had many excuses to not get it out: too time-consuming, other kits I wanted to do first, and any other excuse you can name. In reality, I was scared. I wanted this to be perfect, and I was scared that I would mess it up and irreparably ruin the final product. Thanks to the pandemic this year and the shutdown of much of our economy, I decided I did not really have an excuse to put this off anymore. I was most of the way through my stash of kits, and the time seemed right. Because of the size and length of this build, I will be posting build diaries through each of the major steps. Today's focus is the cockpit and the figures that go in the cockpit. I was not totally satisfied with how the lighting in the cockpit turned out, but I am happy enough to let it go. For me, the focus is on the rest of the ship, and I probably will not have the cockpit light unit turned on a lot of the time. There are a lot of really excellent builders out there who turn their cockpits into an incredible labor of love and skill. I am not one of those builders, but I am glad I put the time into improving it just a little.
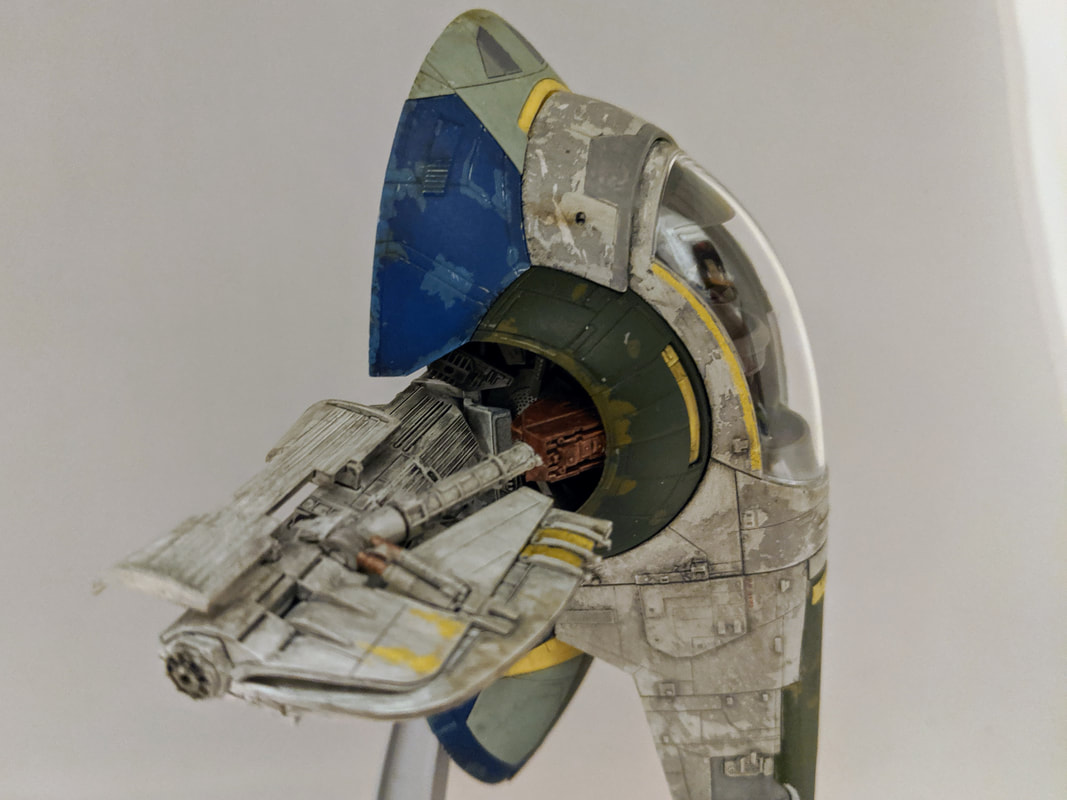
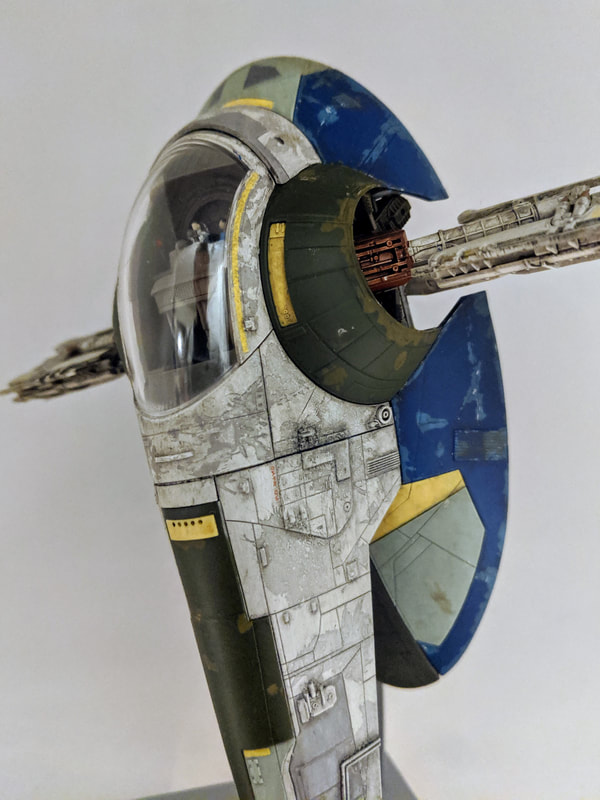
Next up: Starting the Sub-Assemblies.  Nothing like that classic arrowhead shape! The recent pandemic and subsequent quarantine period have emboldened me to take on some bigger and more intimidating projects. Not only have I been working on bigger models that have been sitting in my stash for a while, but I have also started doing some board game miniature painting. Look out for those posts soon! I guess staying home a lot gives you courage to do even more nerdy and introvert-friendly things... I have some big ideas to share a build diary of my progress through the biggest model I have ever attempted, the Perfect Grade Millennium Falcon, but first I have to share a few thoughts on this very high quality Star Destroyer model made by Bandai. 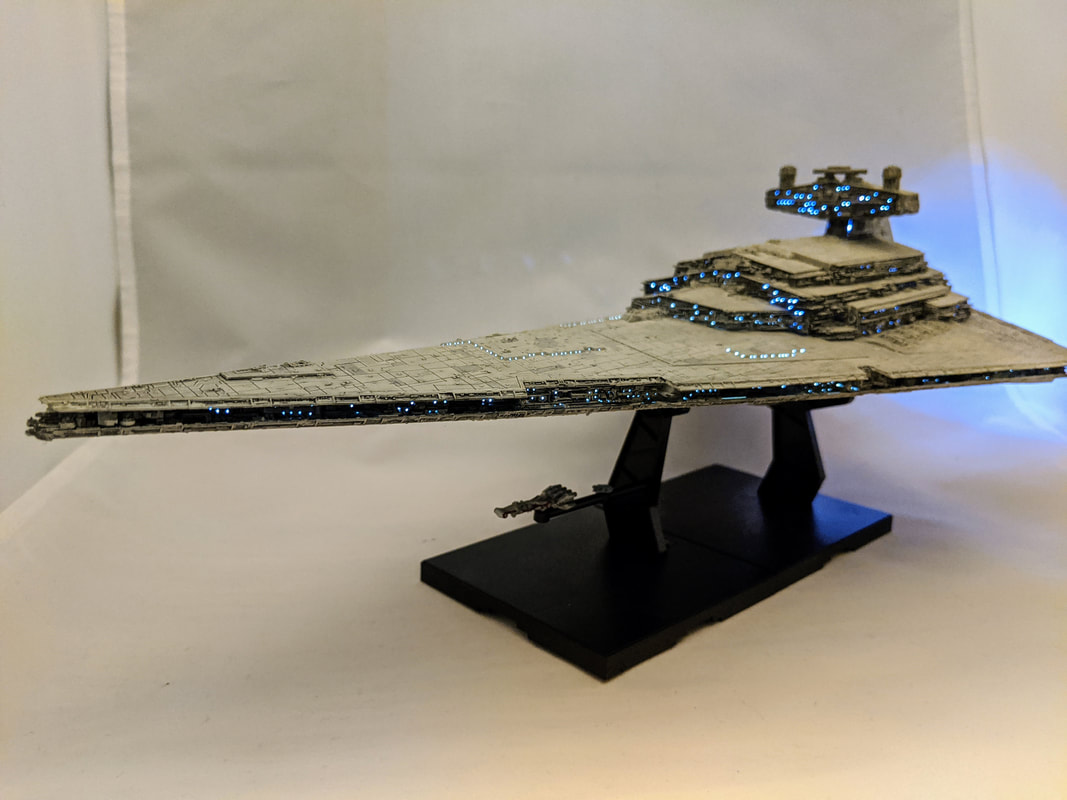 Such a simple design and so beautifully detailed. The first time I heard about the production of this kit was probably a little less than two years ago. I keep a regular eye out for any news of upcoming Star Wars model kits on multiple social media platforms, so I usually know things as soon as they drop. At first, I was unsure about whether I wanted to add this kit to my collection. It is about one foot long, and I wasn't sure about the space in my corner of the basement. Then, I went to Star Wars Celebration in April 2019 and saw a finished one in person and was immediately hooked. Despite being on the smaller side, the detail was not compromised, and the lights gave it that extra punch. 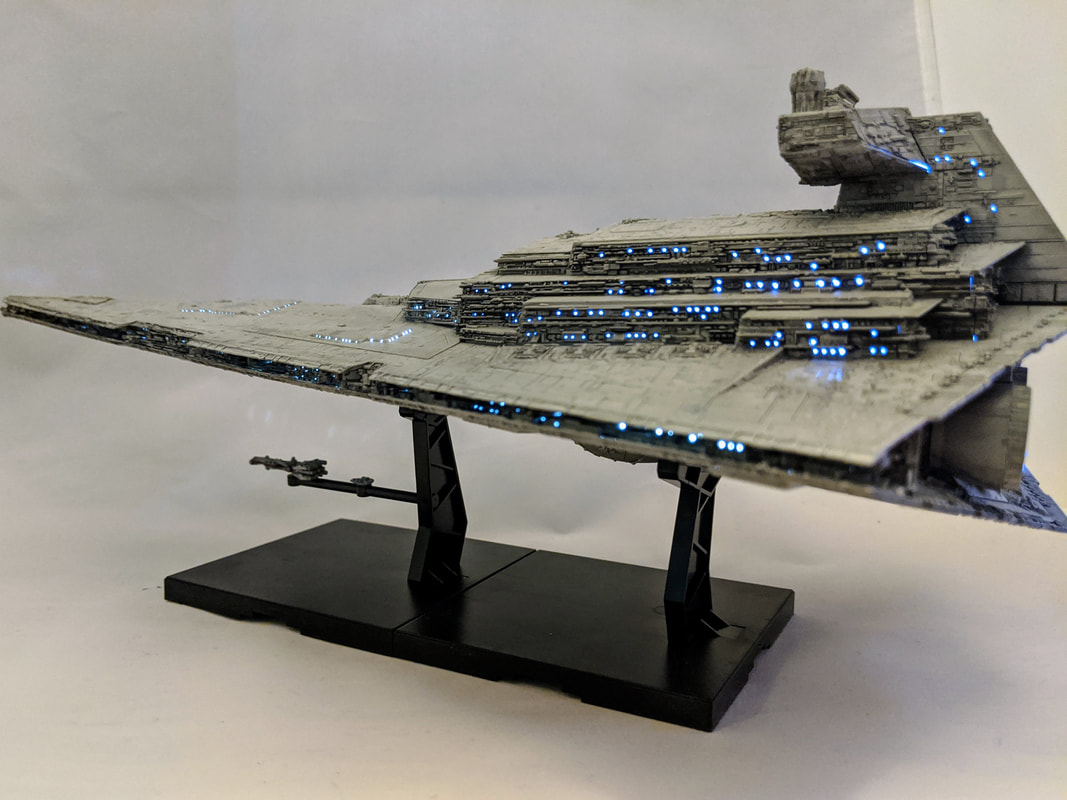 Look at all of those little details on the sidewalls! Spring 2020 arrives and I am stuck at home, so what better time than to bust open the Star Destroyer box. As you can see in the picture above, the kit comes with a Millennium Falcon and Tantive IV to scale, and they are tiny! I started by painting those, which was really just giving them a coat of paint and then adding some tiny markings on them with the smallest brush tip I have. I love the way they give scale to the size of the Star Destroyer. There are not a huge amount of pieces to this kit, as it is primarily the two main body pieces, the sidewalls, and the parts for the engines and the bridge tower. I did a little research on what other modelers had done with the kit and found out that I needed to do a little light blocking around a few seams on the main body and the bridge. I just used some aluminum tape to accomplish that. I also glued the top and bottom to the sidewalls because there was a little gap that I did not want light to shine through. 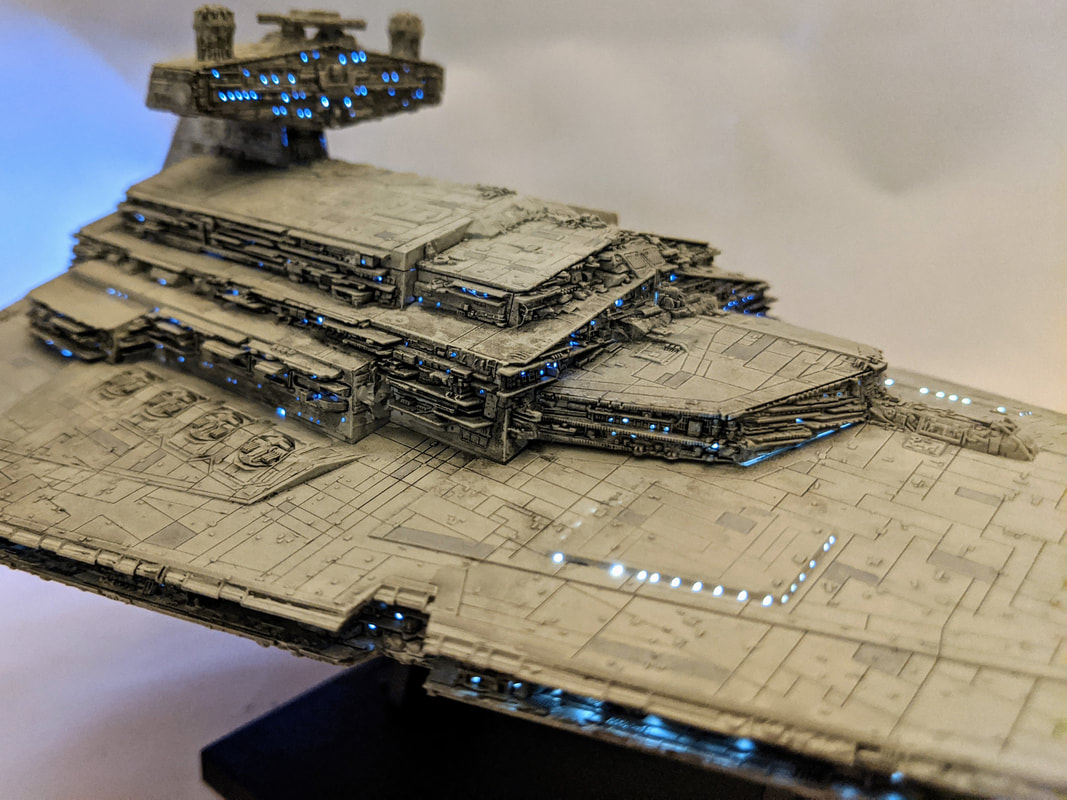 The bridge tower section, which is pictured above, has to be pulled off to reach the lightswitch, which is kind of a pain, but not something worth complaining about. Also, there is a white plastic piece that covers the battery box which I cut out a little to more easily reach the on/off switch. Unfortunately, I don't have pictures from my own work, but I found a few online that helped through the modifications. I used Tamiya AS16 Light grey as the base color and then hand painted in all the darker grey spots with Vallejo Air Light Gray. Finally, I finished off the kit with a dark gray wash to highlight all of the panel lines and help the sidewall details pop. 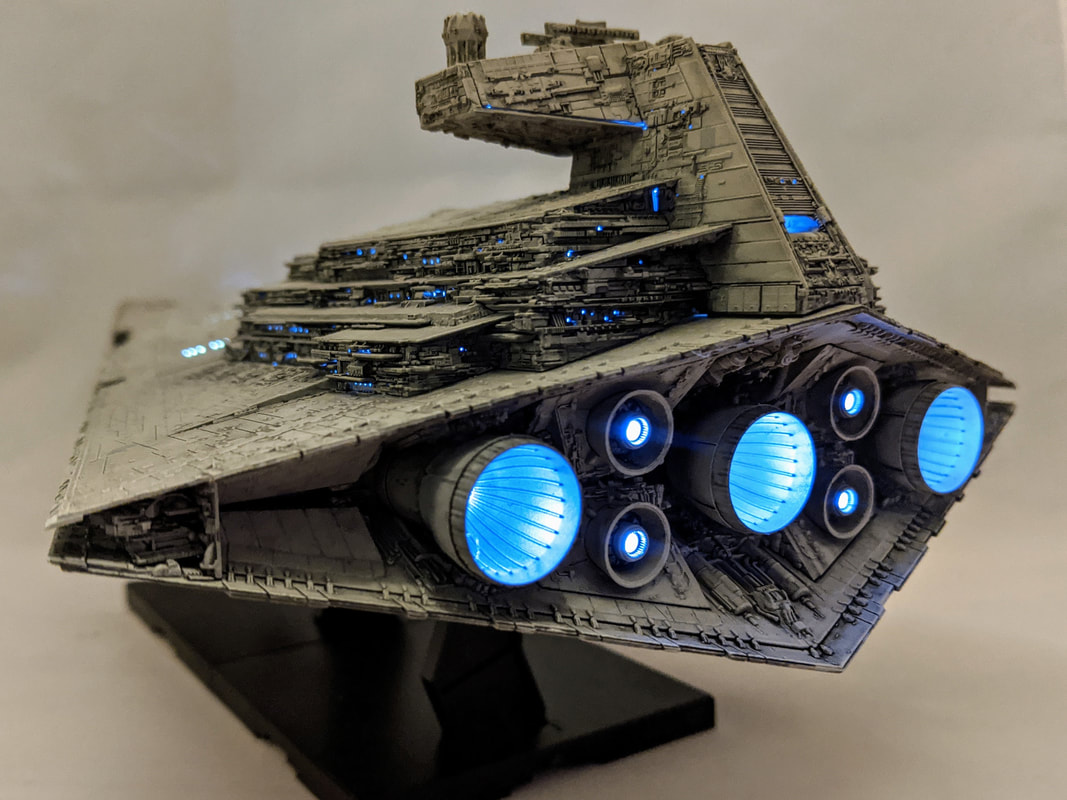 I am normally not into the time and expense of lighting my kits, but because lights came with this one, I went for it. I have to say that the lights turn this kit from great to amazing, and I am so glad I did the extra work. I was not able to fix all of the spots where light leaks, but I am happy with what I was able to do. Despite being a fairly simple kit, I feel this is a highlight of my collection. 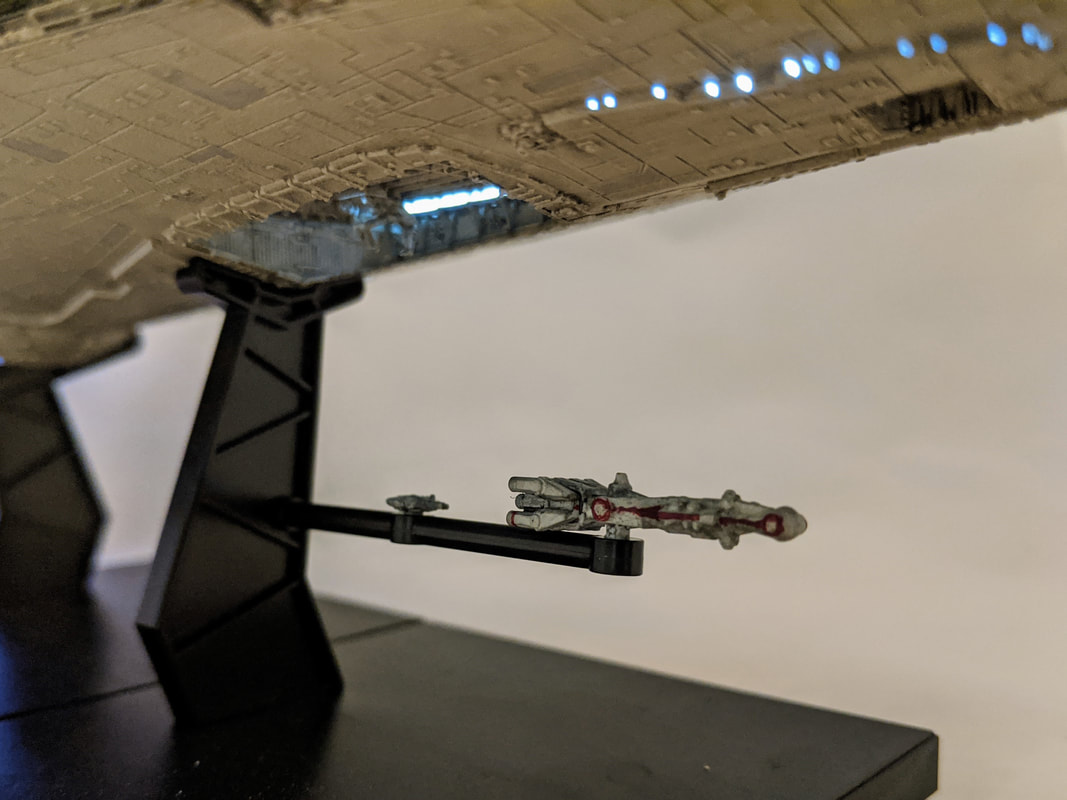 It's bad news for these Rebels... If you followed my other page at all while I was counting down to the release of Rise of Skywalker, you probably know that I love X-Wings. A lot. As in, the amount of X-Wing paraphernalia in my house outnumbers the average person's shoe closet. I had been tracking Bandai's X-wing releases, and particularly their 1/48 scale classic Red 5 X-Wing with lights and sound effects, for a while, but it was prohibitively expensive until I caught it on a 50% off sale.  Overall, this kit was a great pleasure to build and the big scale allows for a lot of great detail, especially in the cockpit and engine parts. The added bonus of lights and sound effects makes for a great display model! I used a combination of paint and decals, as I often do with Bandai kits, with a base color of Vallejo Model Air White Gray. 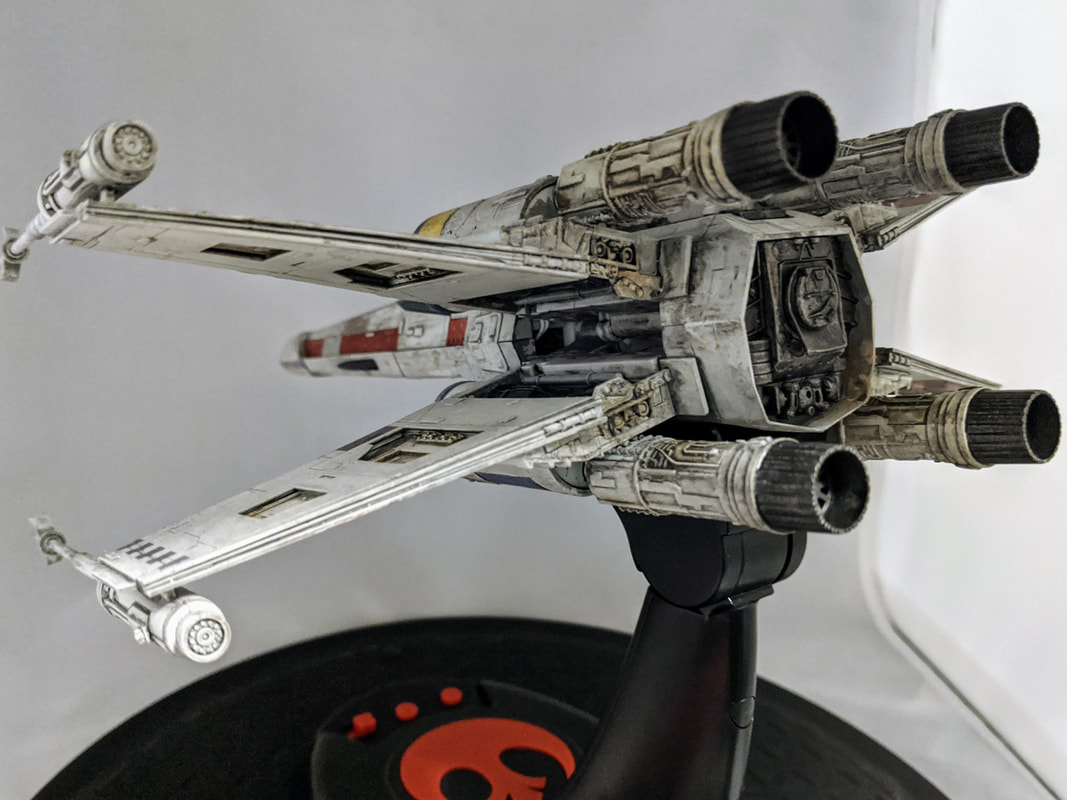 For the weathering I used a dark gray Vallejo wash and Oilbrushers for some of the engine rust. I ran into a scary problem when one of my matte clear coats fogged up most of the model. I had to spend some time wiping off the model with thinner, especially on R2-D2 and then giving it a gloss coat to help defrost the matte. I was able to work it out in the end, but I got very anxious for a while. 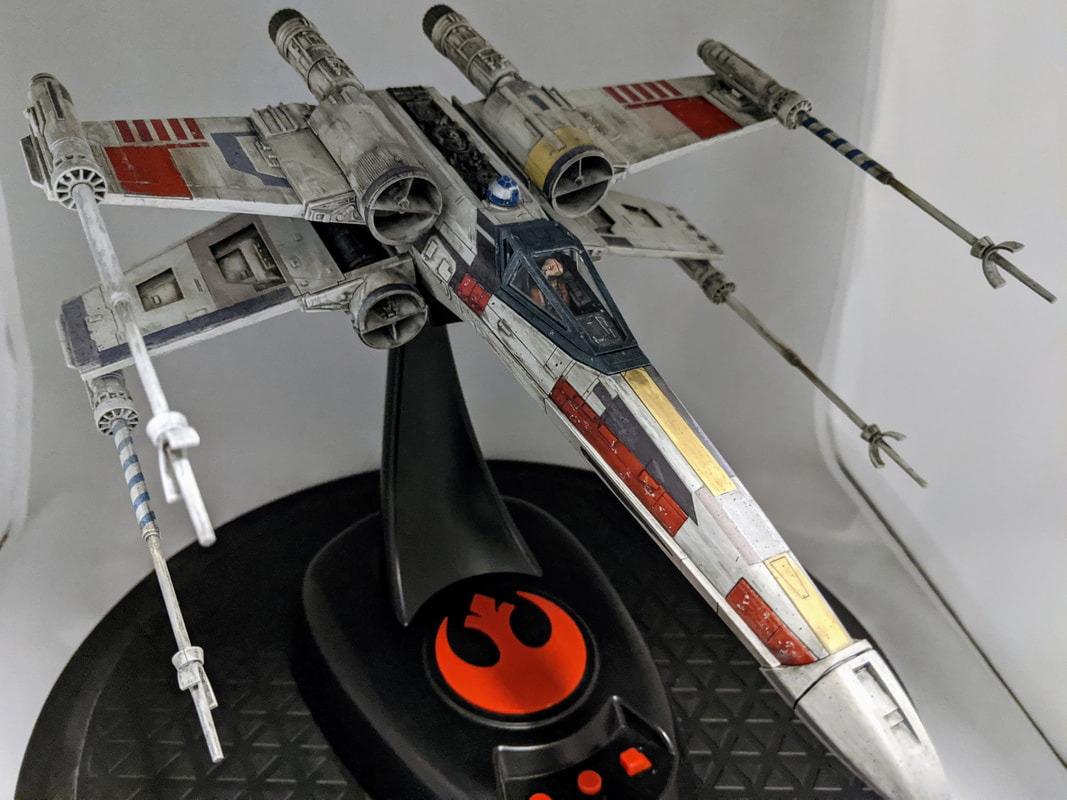 This kit is pretty hard to find these days, but if you can grab one, it is well worth the investment. Between its size and the bonus light and sound effects, this X-Wing will make a great shelf piece! 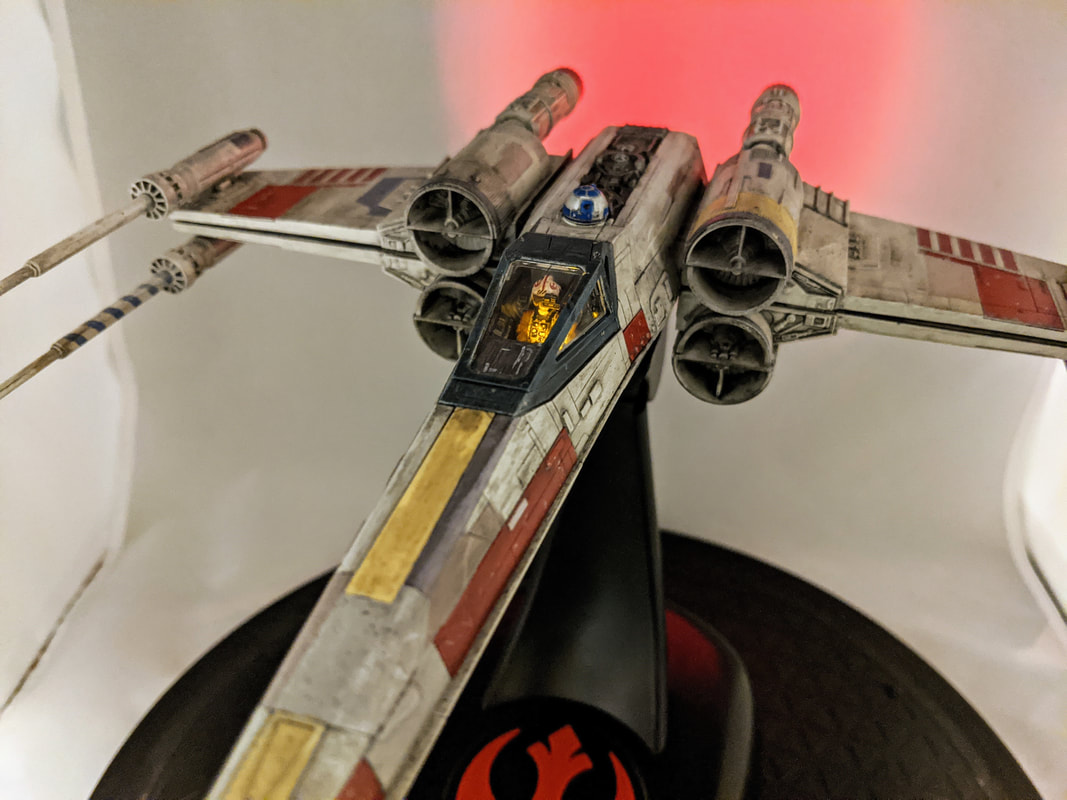 Even the cockpit has a little light inside! 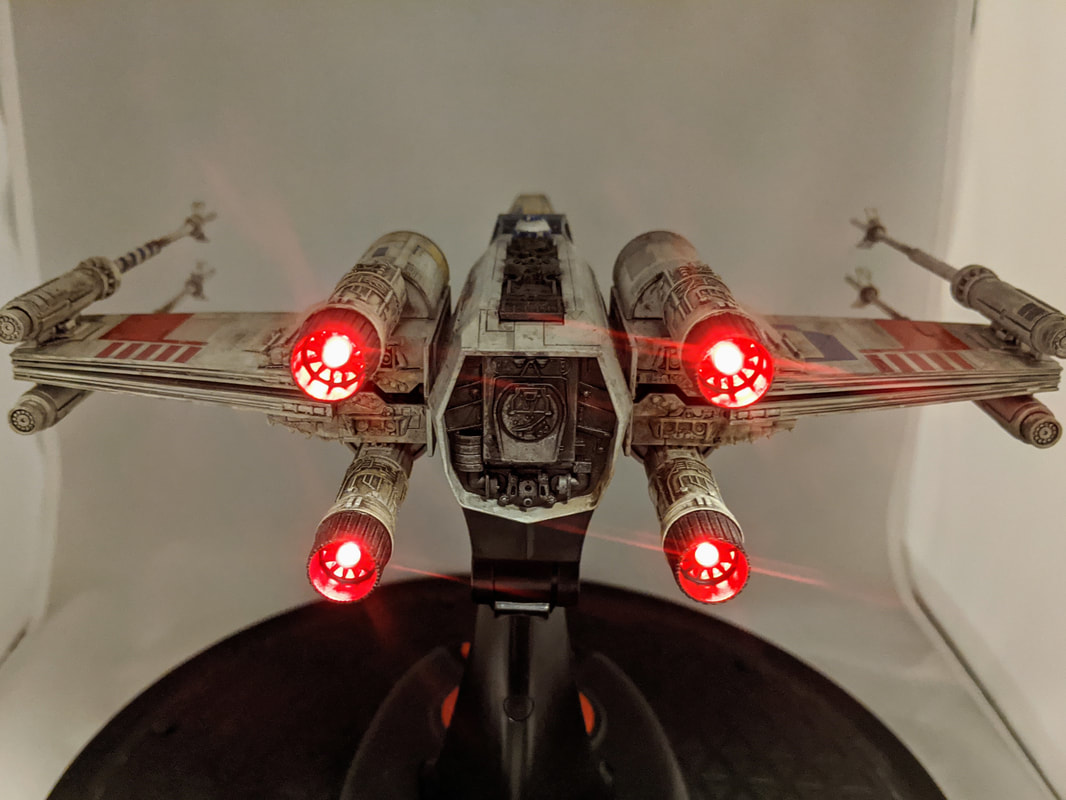 The rear engine lights look great. 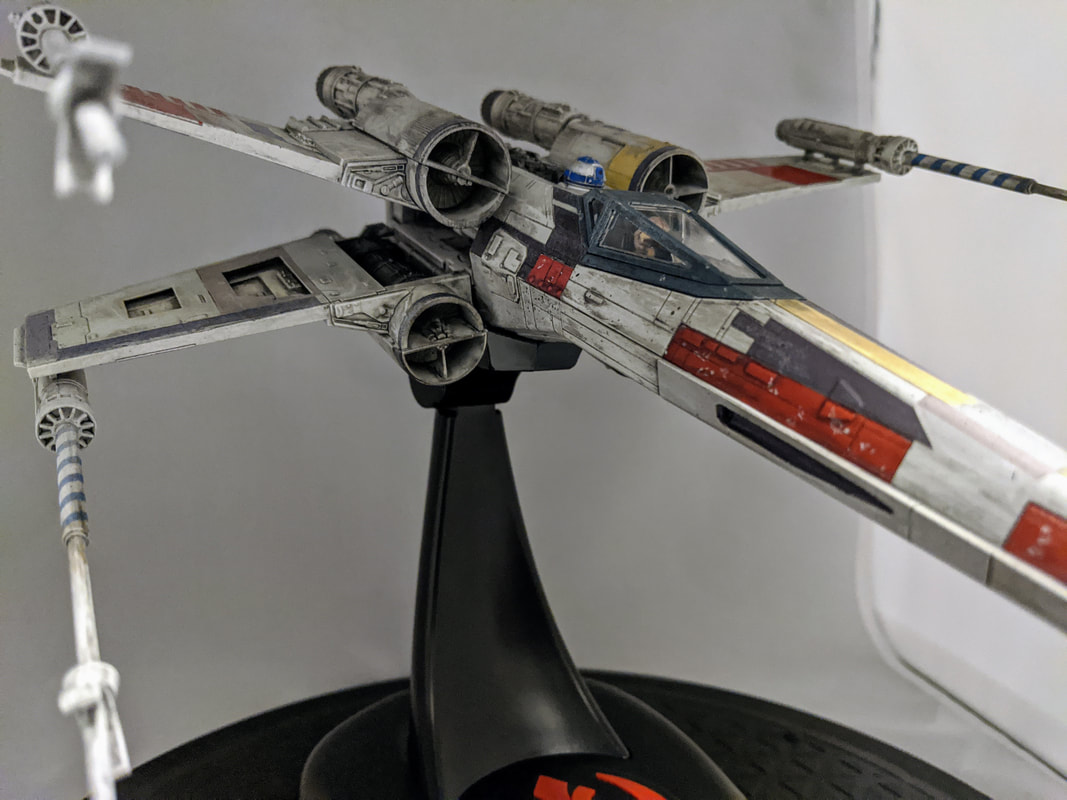 One of the more controversial aspects of the Prequel Trilogy was the introduction of Jango Fett as the clone father of Boba Fett. Whether you like this story point or really hate it, I think we can all agree that the Fetts are a cool looking Father-Son duo. Since my last post was about Boba Fett, it only seemed right to follow that up with a little about his dad. Plus, two days ago we celebrated Father's Day here in the US. All signs point to this post being as convenient as a too-neat little plot point about an iconic bounty hunter and his clone dad... 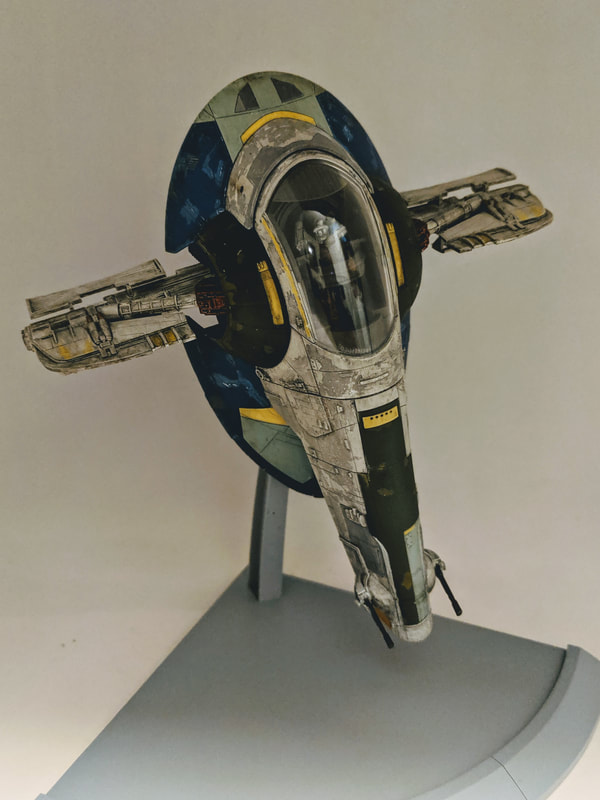 The model kit pictured above is the 1/144 scale version of Jango Fett's Slave I. I have always liked the color scheme of Jango's ship, and I built a version of Boba Fett's Slave I many years ago (albeit a much lower quality kit). In addition, this ship is a great compliment to Obi-Wan's Jedi Starfighter, which will someday look great in a little asteroid field diorama. As with Boba Fett himself, the weathering was the biggest challenge on this kit. 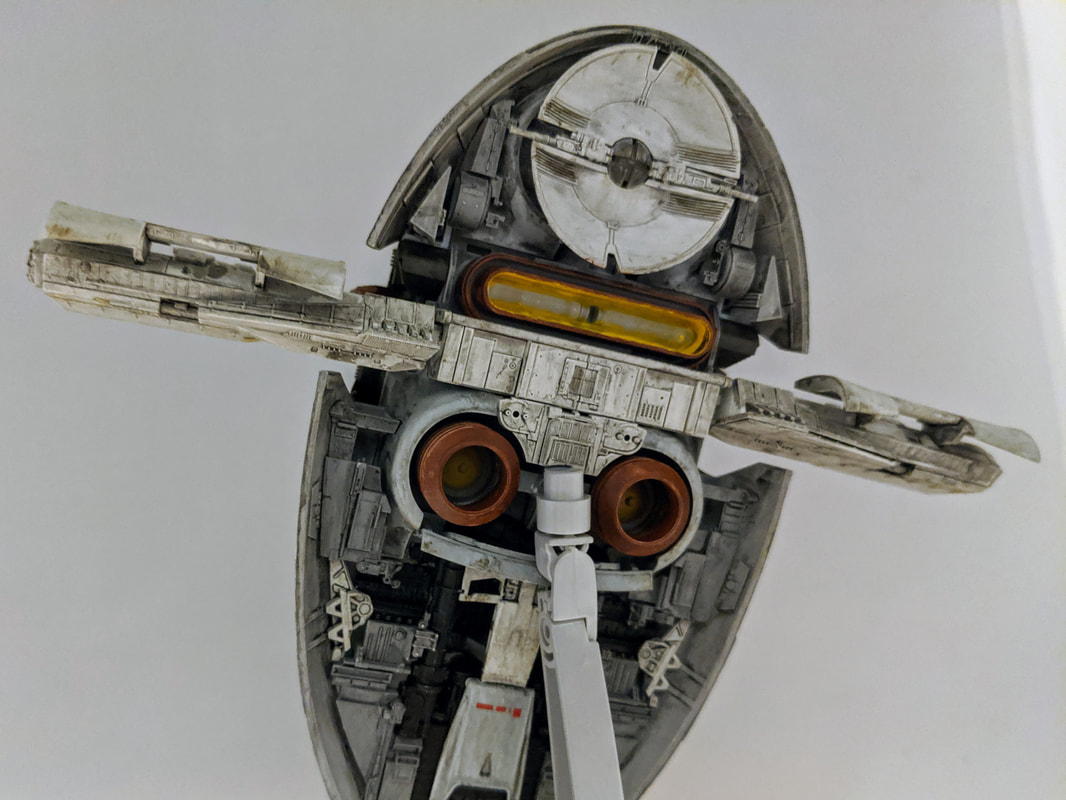 I ultimately decided to paint and weather a lot of this kit in smaller chunks because everything has a different look and color scheme. For the blue skirt, the gray body, and the green parts of the ship I used the liquid mask technique extensively for the first time. To accomplish this, I first airbrushed a layer of lighter color, then spread liquid mask in the areas I wanted to show through, then added a coat of the darker paint on top. Once the paint was dry I chipped off the mask to reveal the lighter shades underneath. Overall, this method is fairly time consuming but looks great once finished.
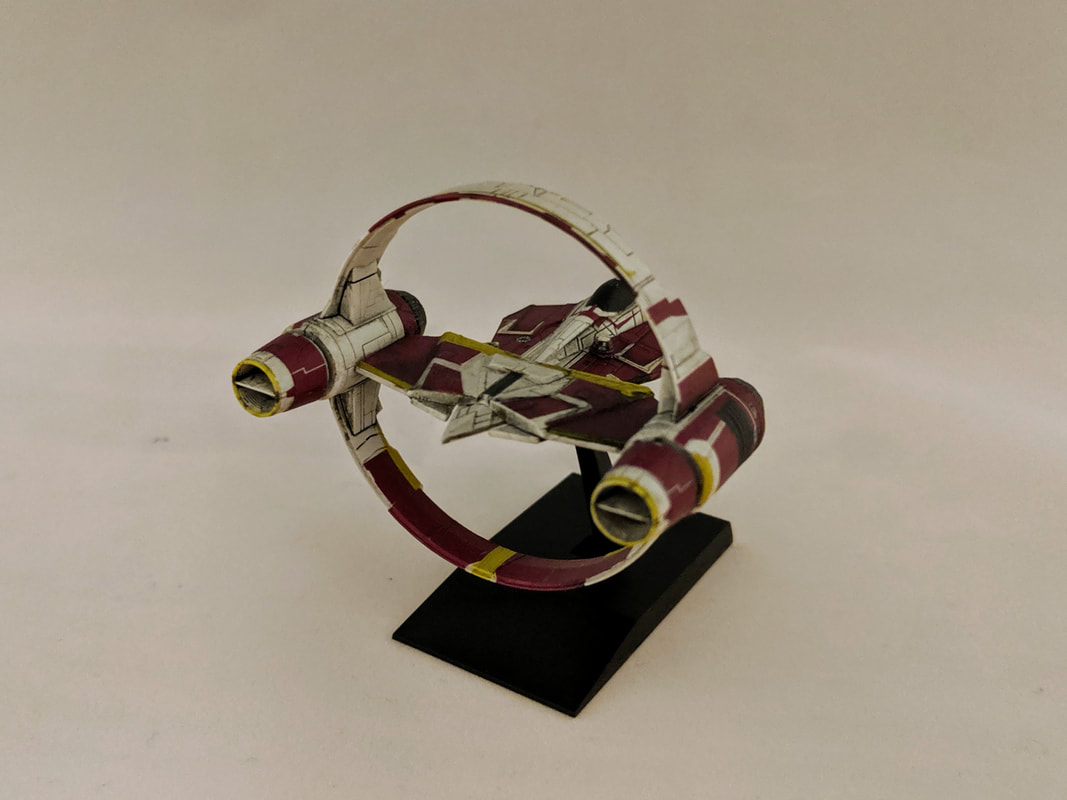 I finished off a very productive summer last year with this tiny little Jedi Starfighter from Attack of the Clones. The scale is 1/144 so it is quite small, but as usual with Bandai kits, the detail is still incredible. Several years ago I built the 1/72 version of this ship when it was made by FineMolds, and I remember having a terrible time with the decals and all around frustration with the small size. For a kit that is half the size, I found this one twice as easy to assemble. 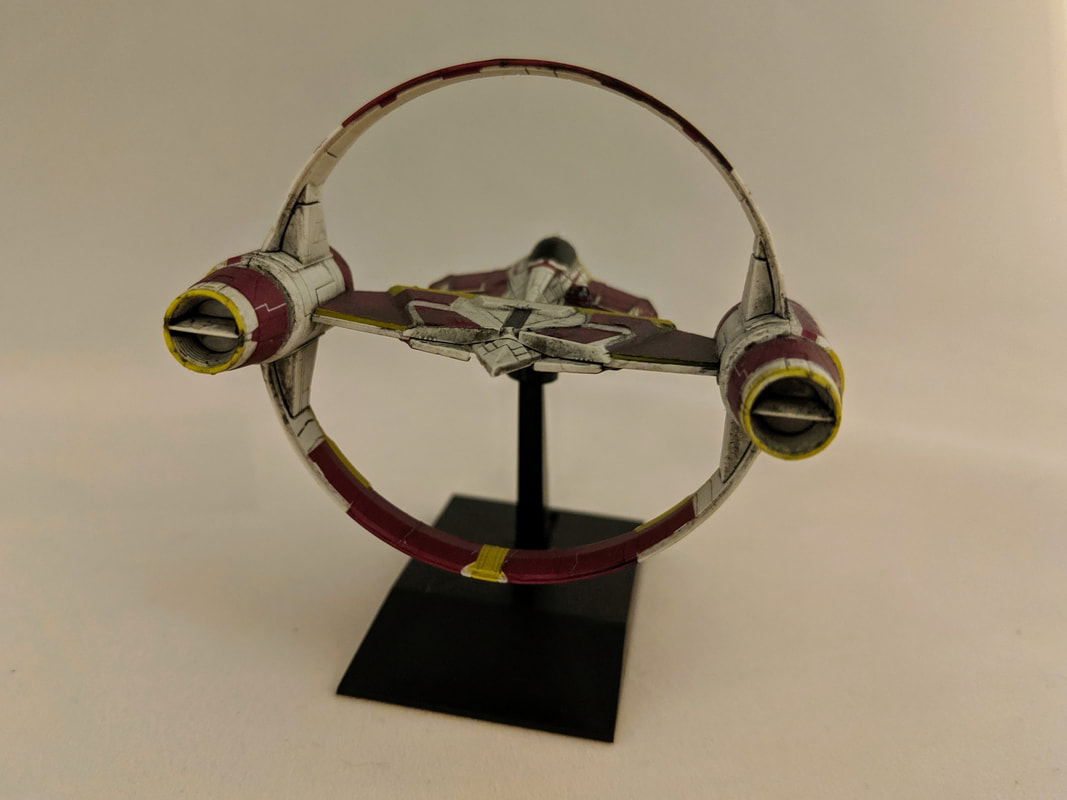 The assembly took almost no time, as I believe there were about two sprues in a tiny box. I primed everything and gave it a white base coat, and everything else was done with decals. If I had used the Bandai decals from the box I probably would have pulled my hair out because they were stickers and not slide-on decals, but fortunately, one of my favorite decal makers on ebay (yogurt80) had a set designed specifically for this kit, and they worked beautifully. I think there is a lot of room for building a fleet of unique Jedi Starfighters, but I do not have the money nor the painting skills to try it. Plus, I love Obi-Wan. 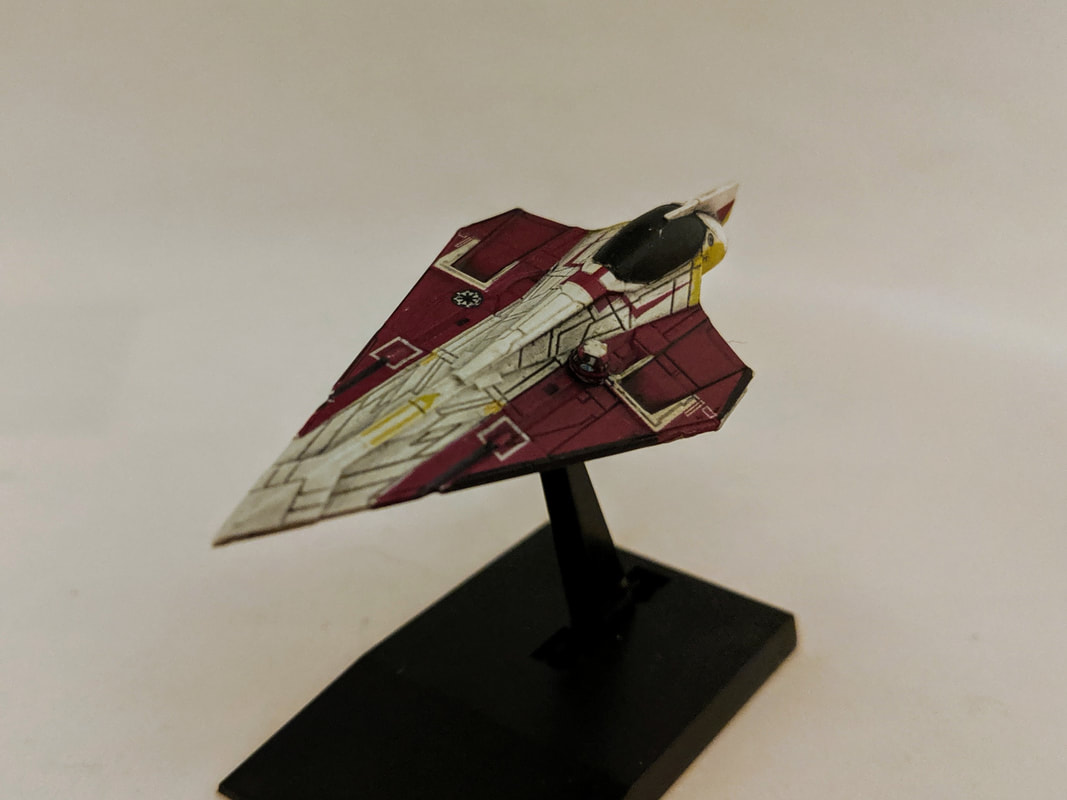 The ship slides in and out of the Hyperspace ring well, and the base attaches only to the starfighter for display purposes. I am definitely considering an asteroid field diorama with Jango Fett's Slave I in the same scale, but display space may play a role in whether that ever happens. 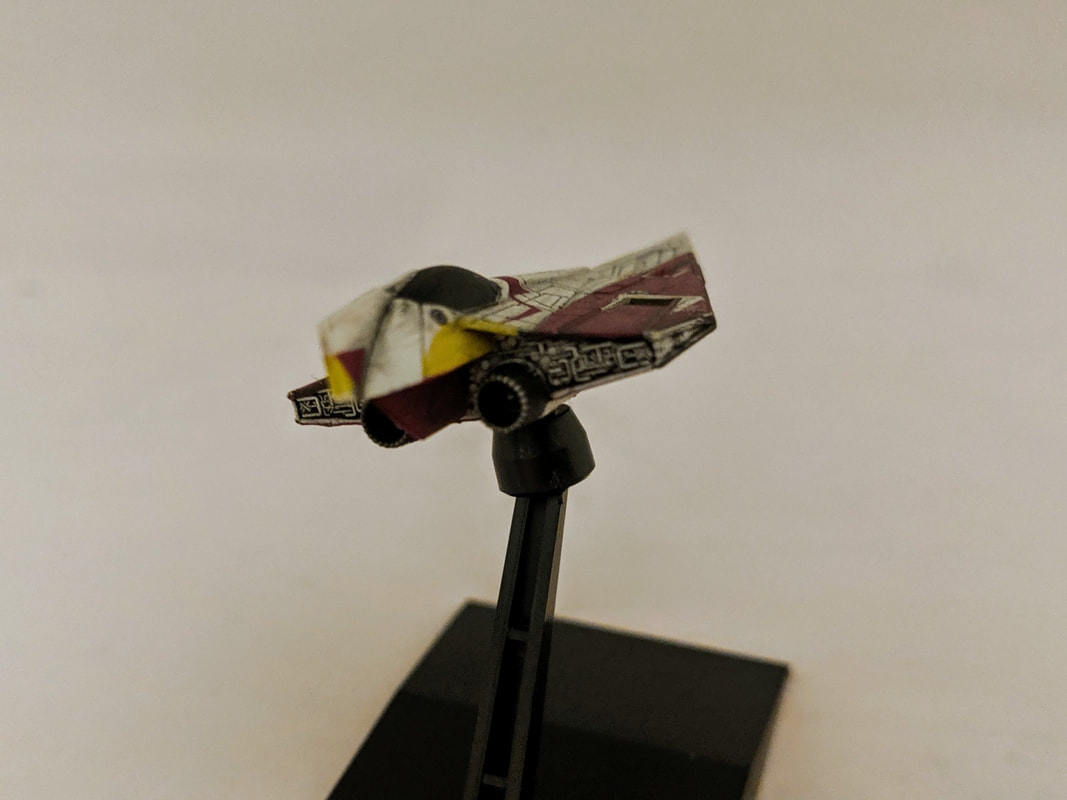 The only weathering I did was a dark gray wash and some oil streaking, which gave it a weathered but not overdone look. Jedi do not seem the type to keep their ships too dirty. If you can still find this kit I would recommend picking it up. It is cheap, has great detail, and many possibilities for customizing to your Jedi of preference. Make sure, however, that you either find good decals or have fantastic painting skills. 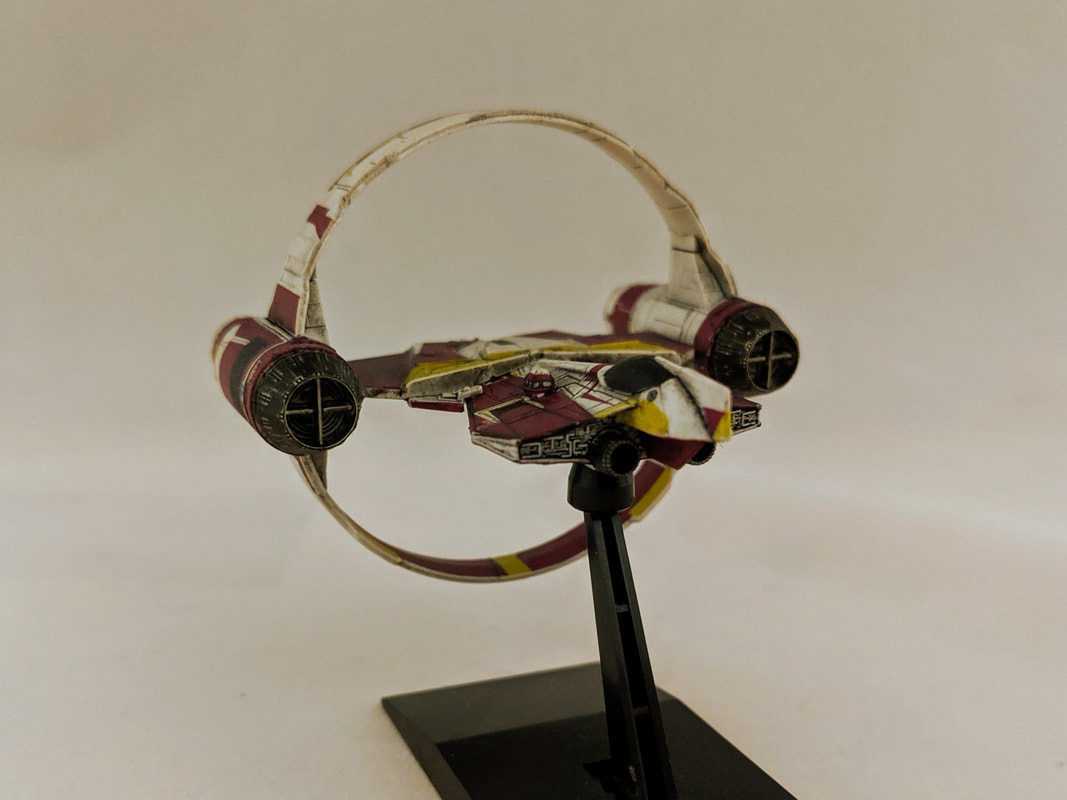 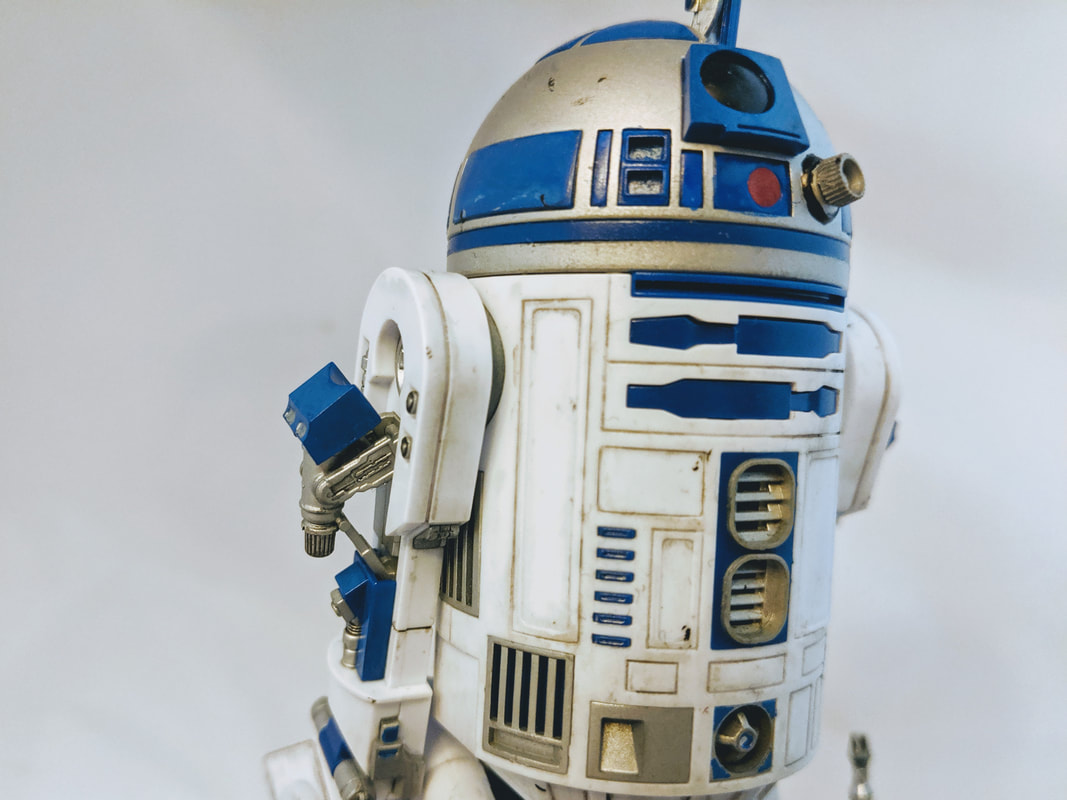 For anyone who regularly builds Bandai model kits, there has been a noticeable proliferation of droid kits, mostly of the astromech variety. This has been slightly frustrating for me because I miss the character kits and get a little tired of the same droid kit re-released in a different color scheme. Obviously, it is an easy cash grab for the company with little need for creating new kits, and I have backed off from buying many of the new releases for that reason. I have picked up a few, however, and will share some of my thoughts about each of them below. First, the rocket booster version of R2-D2. I had already built an R2 kit a few years ago, but when I saw the rocket booster version I thought it would be a good chance to improve on what I did before, and I was a fan of the prequel-centric accessories. The biggest difference between this R2 and my previous R2 was that I painted all the silver myself instead of leaving the mold color. This meant that I had to do some filling and sanding on the head in particular, which I always dread. I was actually pretty happy with how it turned out, however. Also, if you look at the comparison shot above, the painted silver looks so much better than the plastic molded color. I went with the in-flight pose and the zapper on his head to give this R2 a more prequel style.  This drink holder accessory was a main driver for purchasing the R4-I9 kit. Finally, for a completely different kind of droid, I picked up the Star Wars Celebration exclusive 0-0-0 protocol droid from the Dr. Aphra comics when I attended Celebration last April (for my thoughts on that whole experience, check here). This kit was clearly just a re-boxed version of C-3PO molded in black with slightly different decals, but the final look is pretty cool. Of all of the droids in this post 0-0-0 was the easiest to build and paint. I put him together, dry brushed a few silver spots to show a little wear, and then gave him a semi-gloss top coat. Overall, a super simple and quick build that looks great. The droids are fun, quick builds with a lot of room for customization, but I really miss the steady stream of non-droid character kits. I know a new Kylo Ren is out now, but I would love to see some more characters. I suppose the ships will have to keep my satisfied for now...
 Solo will likely never be remembered as the best Star Wars movie for a variety of reasons, but I thoroughly enjoyed it, not least because it gave us a new version of the Millennium Falcon. The number of Millennium Falcon kits on the market is vast, and there are many versions in many different scales from the tiny Bandai 1/350 version up to the amazing Perfect Grade 1/72 scale version from A New Hope. I have the big box Bandai Perfect Grade version sitting in my stash, but I cannot quite bring myself to build it yet out of some elusive idea of needing it to be perfect. One thing the other models of the Falcon do not have is the unique coloring and style of Lando's version. This difference and the smaller size drew me to this kit as a potential stepping stone to the big one in the future. 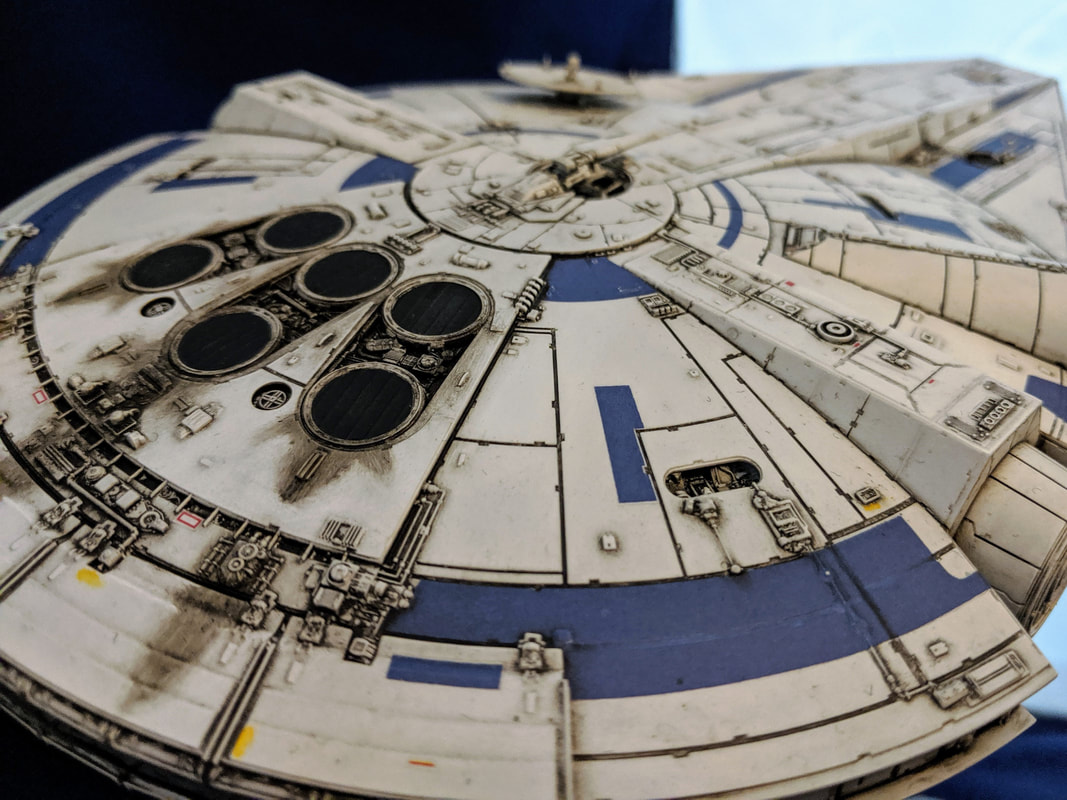 This 1/144 scale kit was a pretty standard build from Bandai. Easy snapfit parts and great engineering make all of their kits fun to build. As I think I have written before, the decals are one aspect of Bandai kits that I am less impressed with so I found a great set on eBay from user yogurt80. I do not believe he has any Lando's Falcon sets available right now, but he makes a lot of great sci-fi decals. 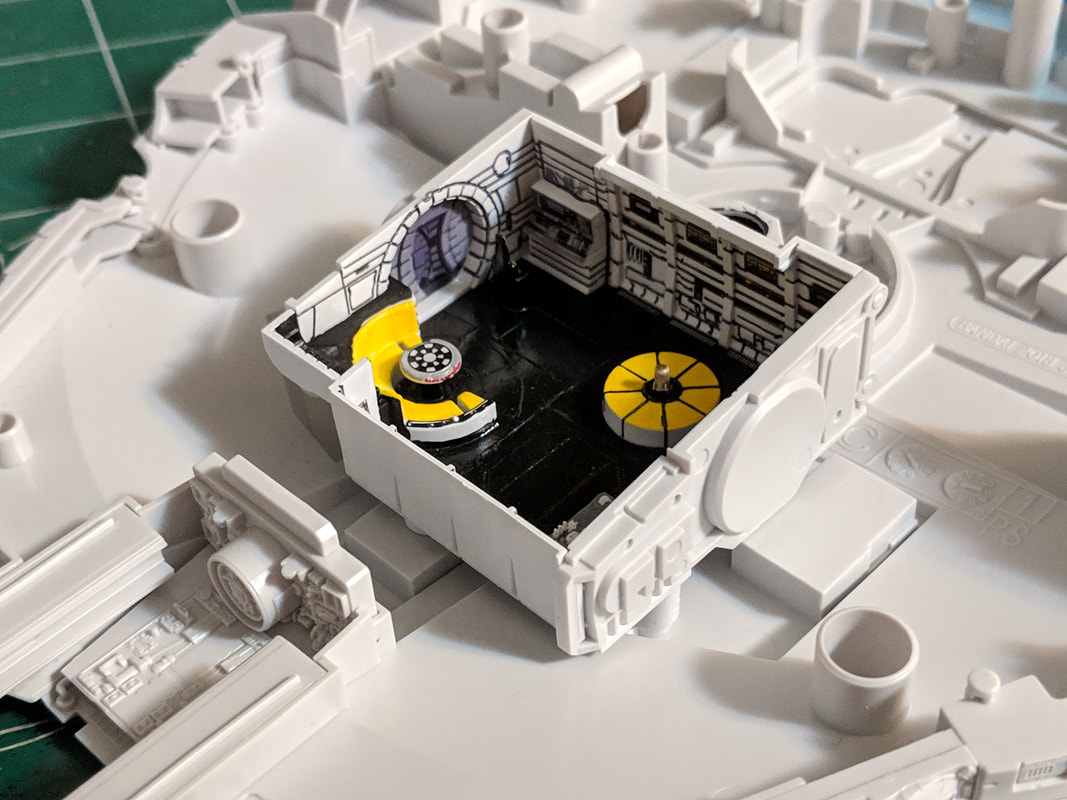 One of the fun parts of this kit was the small inside portion of the ship. I ended up painting a lot of this because even high quality decals had a hard time with all of the crevices. Ultimately, this part is not visible in the final display of the model, but I had fun with it. 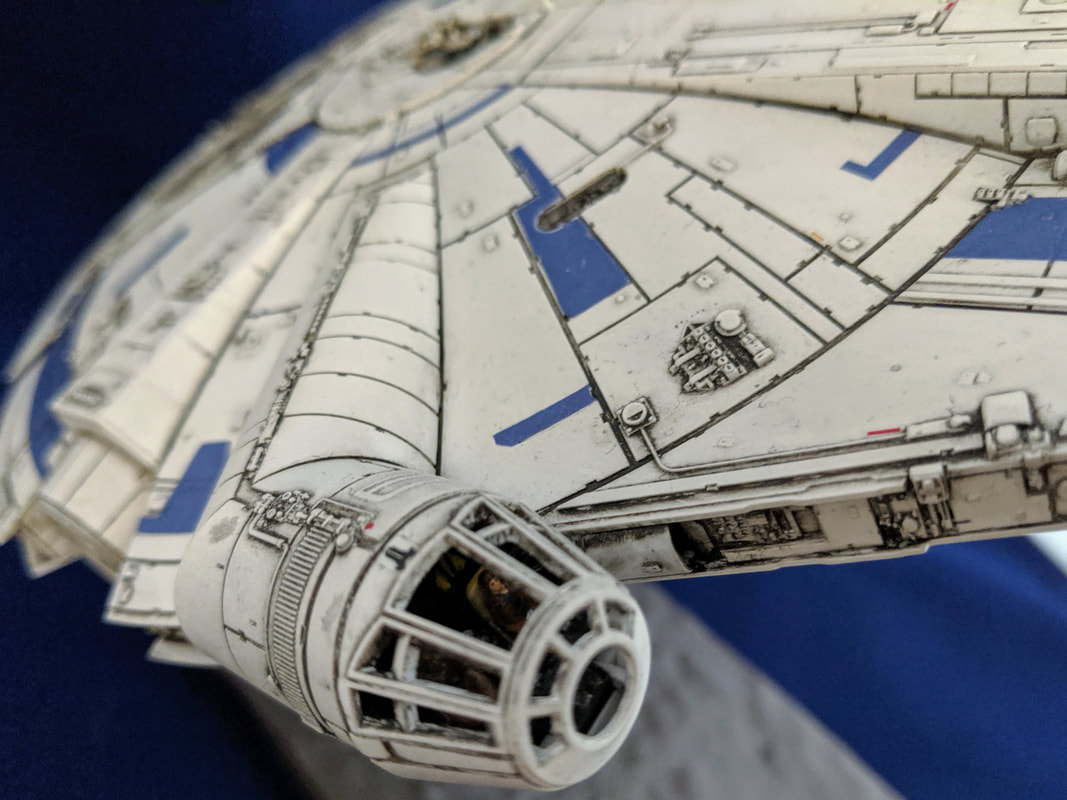 Another challenge for painting was the tiny cockpit figures, which include Han, Chewie, and Lando. In this picture you can just barely see Lando sitting in the back behind Han. Figures in 1/144 scale are difficult to paint well! At least any imperfections are hidden by the cockpit! On the subject of the cockpit, this kit does not come with any clear window parts, but a few of them would have been so small, I can see why the open cockpit makes sense. 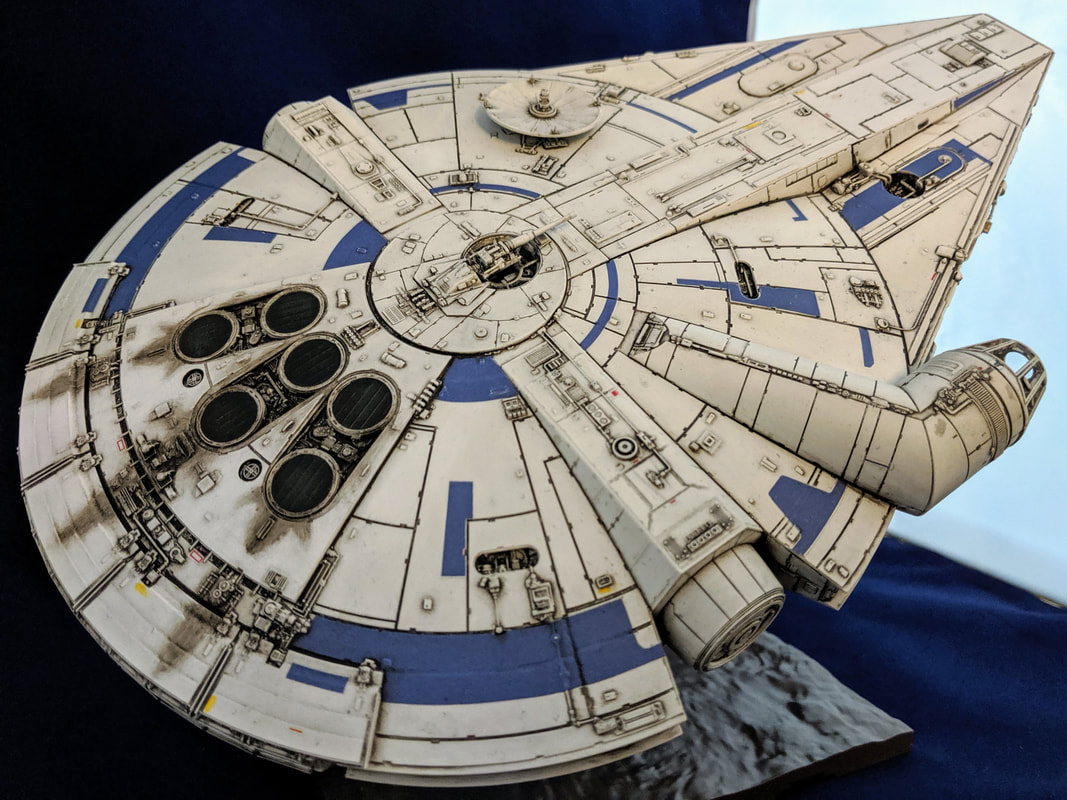 I did not do a large amount of weathering because Lando likes to keep his stuff in top shape, so I did a basic oil wash and then used some oil brushers for the engine exhaust. The final look gives it the just barely used and kept in decent shape look. I was pretty happy with the final results. 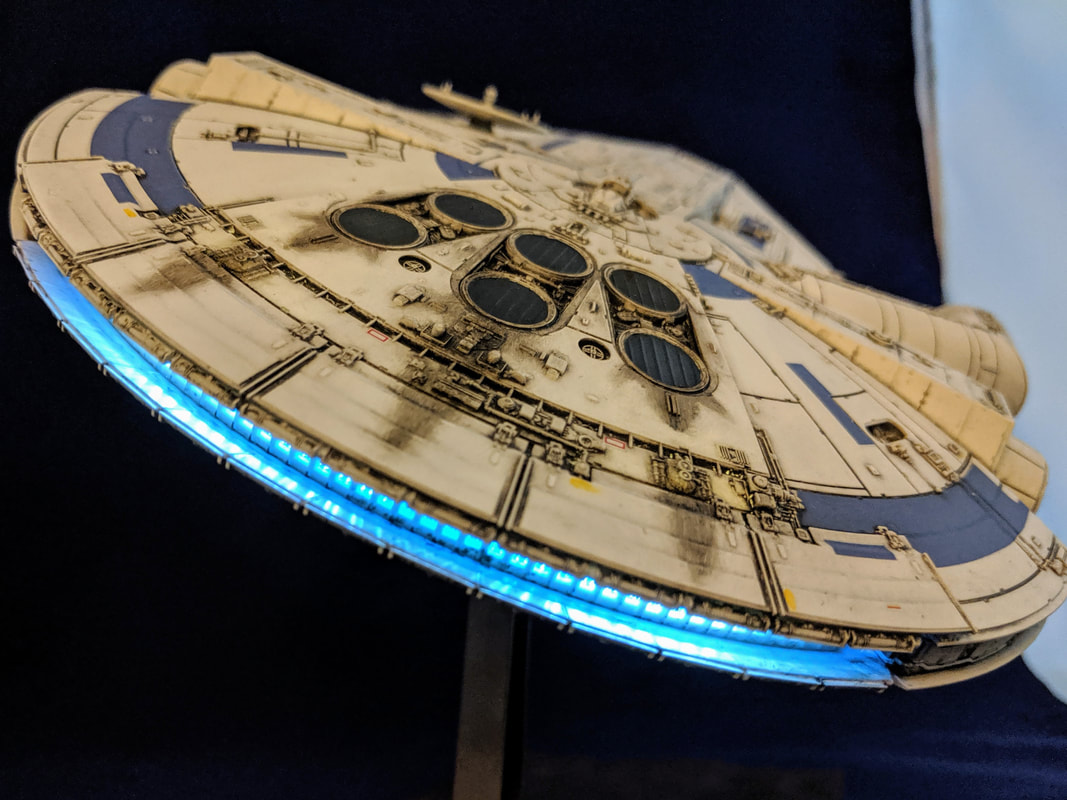 Finally, I bought one of the basic lighting units from Bandai for the iconic blue engines. There is an access panel on the bottom of the Falcon, and I love the look with the engines turned on. It is easy to install, and while definitely not the highest quality lighting unit, it does the job well enough for me.
Quick note for those interested in building this kit. There is no landing gear included, so you will have to scour the internet to find a set. I know there are several out there, but I tend to prefere in flight displays on my models. 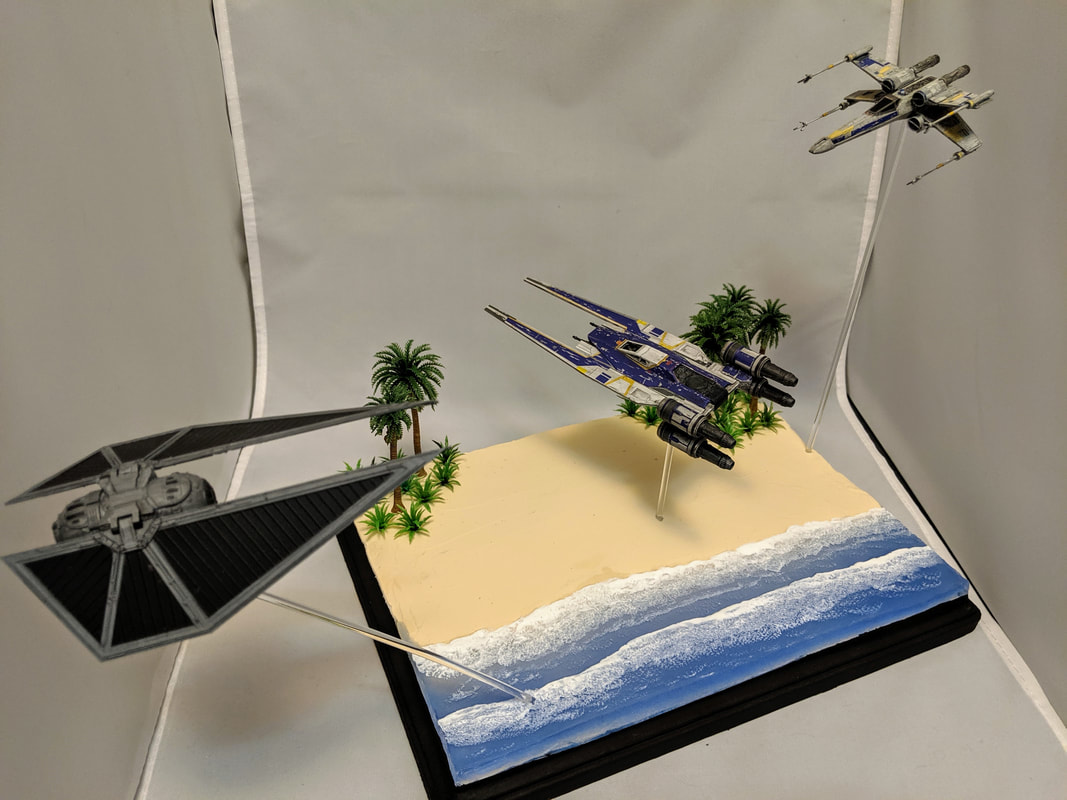 The first half of this year was busy in life but not on the workbench. I went on some great trips to Italy and Star Wars Celebration, but went on very few trips to the model workbench. Part of the problem was that I was dragging my feet on the Scarif diorama pictured above. I had completed the ship builds for all three ships, but I did not have a great plan on how to make a beach scene. I did a lot of research about what products to buy and watched a variety of Youtube videos and finally started to figure something out at the beginning of the summer. I am going to share a little more of my process than usual because I took a few twists and turns during this build. 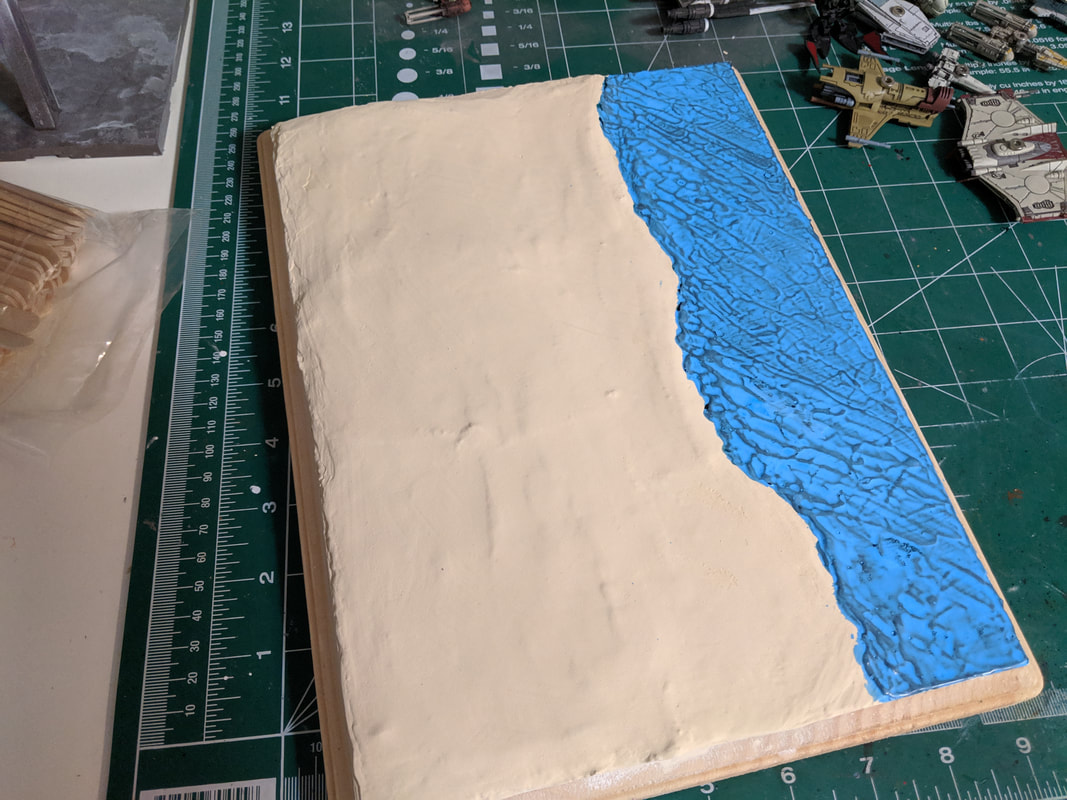 Water attempt 1: Terrible I started by using AK Interactive's acrylic sand material as the base on top of some plaster strips shaped for an undulating surface. Then, I used AK Interactive's water gel for the small portion of ocean and absolutely hated how it looked. After the picture above, I re-coated everything with the sand material and decided to try a different method. 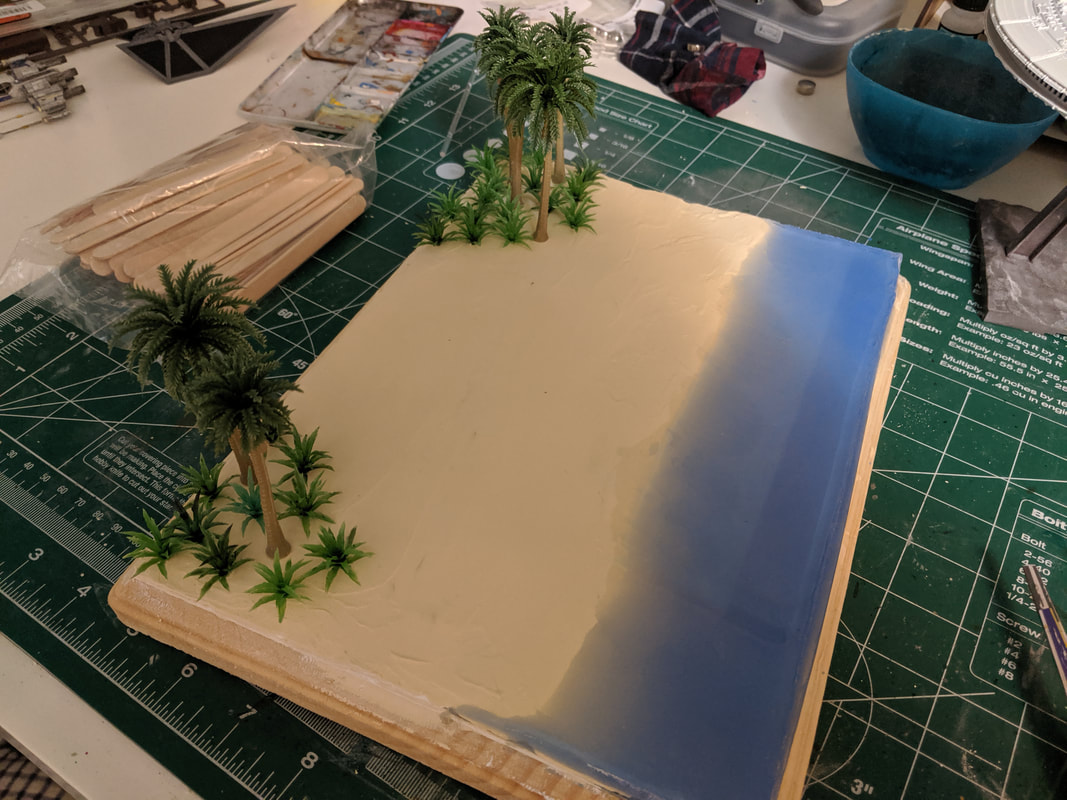 Water attempt 2: Way better Because of the disastrous first attempt, I turned to a method I was previously avoiding out of fear: resin pouring. I watched a few more Youtube videos, bought the supplies and went after it. Fortunately, the whole process of pouring and dyeing the resin was easy and gave a much better result. I would definitely use resin for water again. 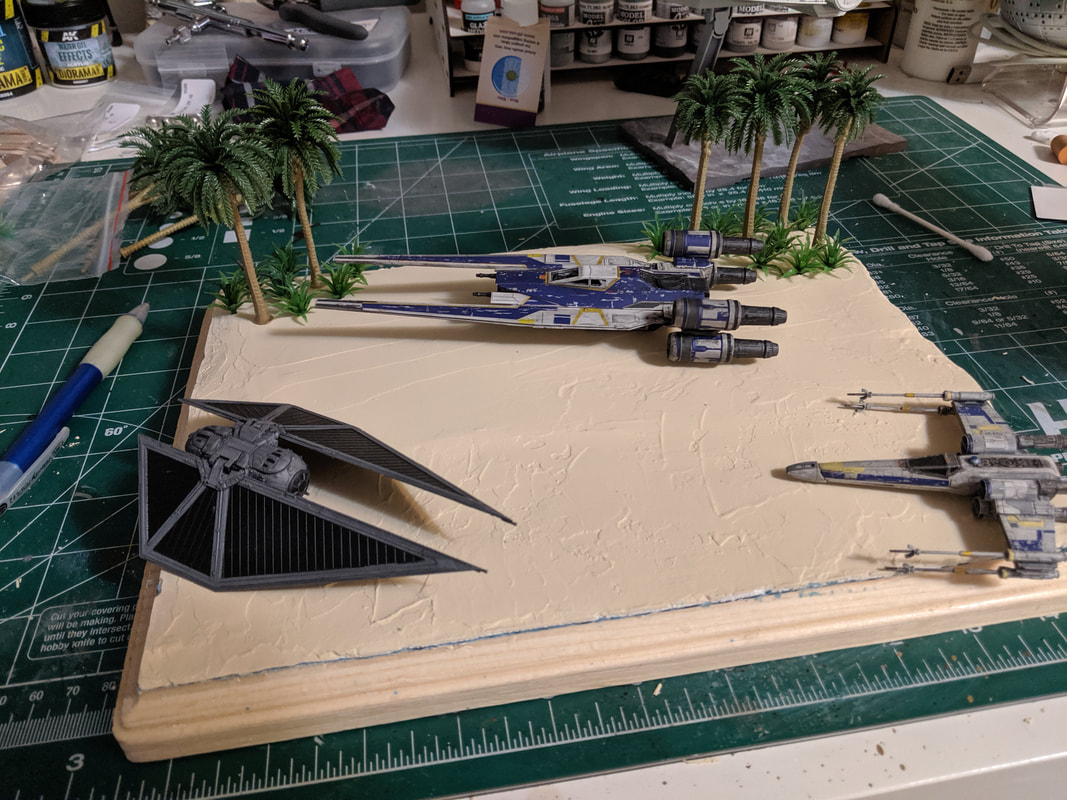 The other important step of the diorama was deciding the layout of the ships. I knew I wanted to show the U-Wing in the process of landing, but I was undecided on the X-Wing and TIE Striker configuration. The hardest part of setting the layout was how high the two smaller ships needed to be in relation to the U-Wing.  This was always the centerpiece of the diorama in my mind. I finally settled on the two smaller ships raised quite a bit and slightly angled off the base. I only have a small amount of space to work with, and I probably would have benefited from a larger diorama base, but I did not have the luxury of that much display area. I am fairly happy with the result. It has a relatively small base footprint and still manages to include all three small ships. 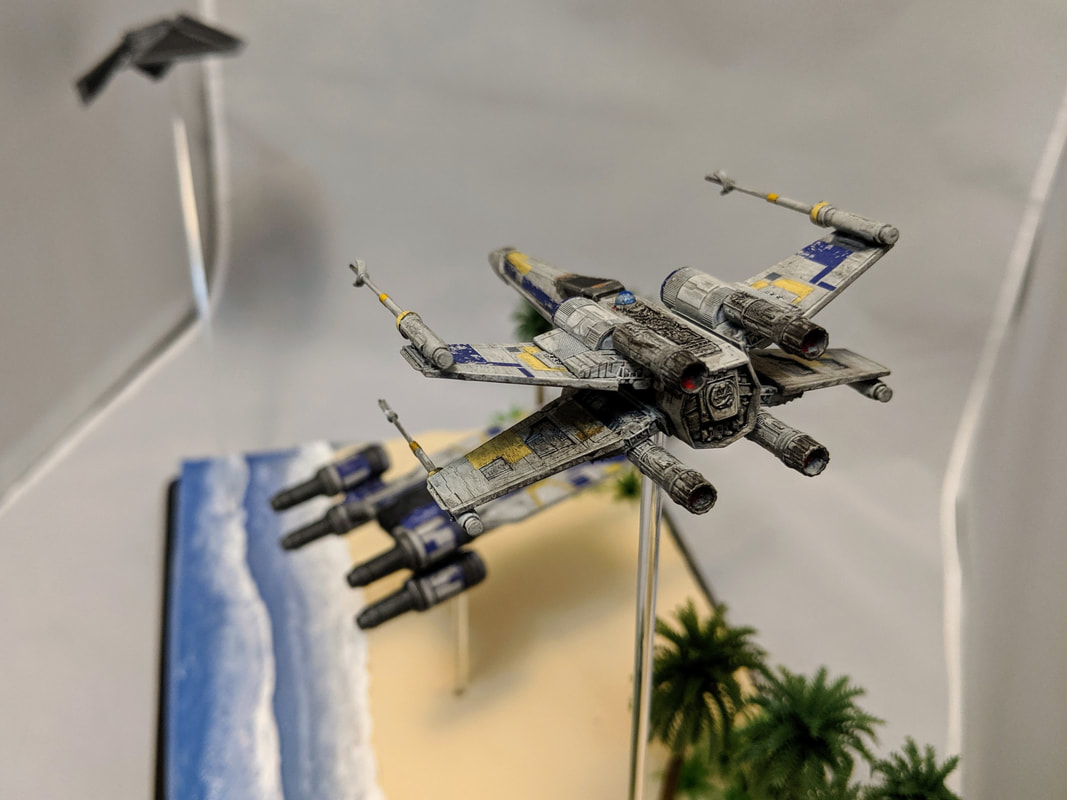 I really like the angle of this shot. One of the last bits of the diorama was the wave effects on the water. I used a different water effects product from AK Interactive, which worked much better than the previously mentioned one. By combining a little white paint with the water effects gel, I was able to give the waves some white caps. Overall, I am happy with this diorama, but I will probably avoid them for a while because of the amount of display space they require, as well as the amount of additional products needed. I will definitely take the experience from this and the Hoth diorama into potential future projects, however. 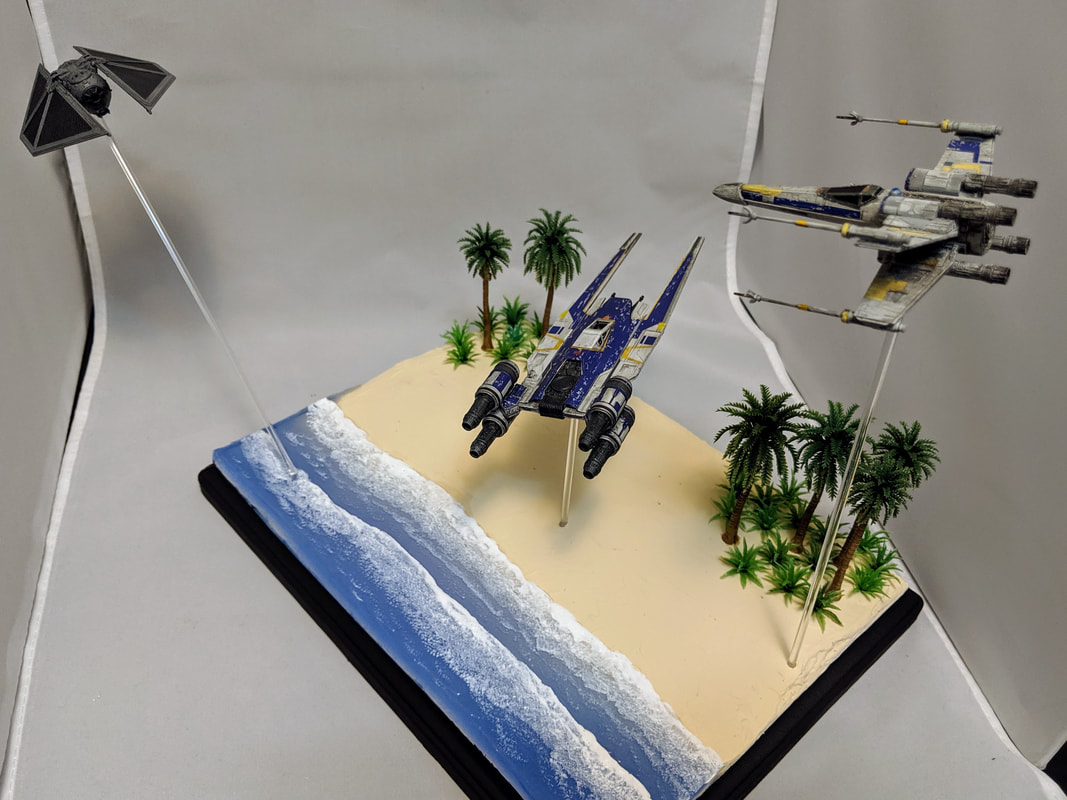 |
AuthorModel builder, board gamer, and all around lover of small scale stuff. Archives
March 2021
Categories
All
|
 RSS Feed