|
For Christmas last year, my wife bought me one of the Han Solo Nerf blasters. Check out the picture below for what they look like. Pretty ugly. 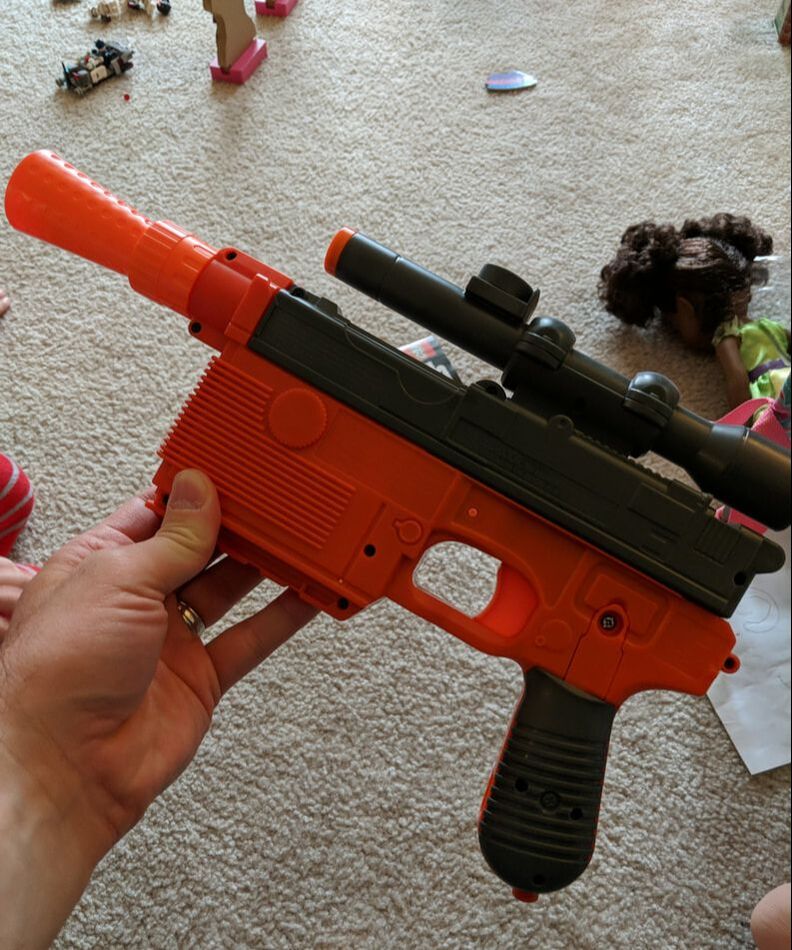 Of course, as soon as I saw it, I envisioned a project. I have seen a few people on Instagram and Youtube doing mods on nerf blasters, so I decided to try it myself. The job was actually one of the quickest and easiest jobs I have done in a while. First, I masked off the clear parts where you can see the inner lights and then primed the whole blaster with Vallejo black primer. Next, I used Vallejo Model Air Metallic Black on the entire blaster. I like the Metallic Black color for the glistening effect it gives. Second, I masked off the area around the handle and sprayed on Vallejo's wood brown paint. In order to give it a slightly darker tone and look a little more handled (pun intended), I gave the handle a dark brown wash. Finally, I used silver paint to dry brush key areas around the blaster to show extra wear and tear, particularly on the blaster tip. Overall, the whole project took maybe a week, mostly in paint drying time. Check out the picture below for the final result. It looks great and still makes a great toy to play with my kids! 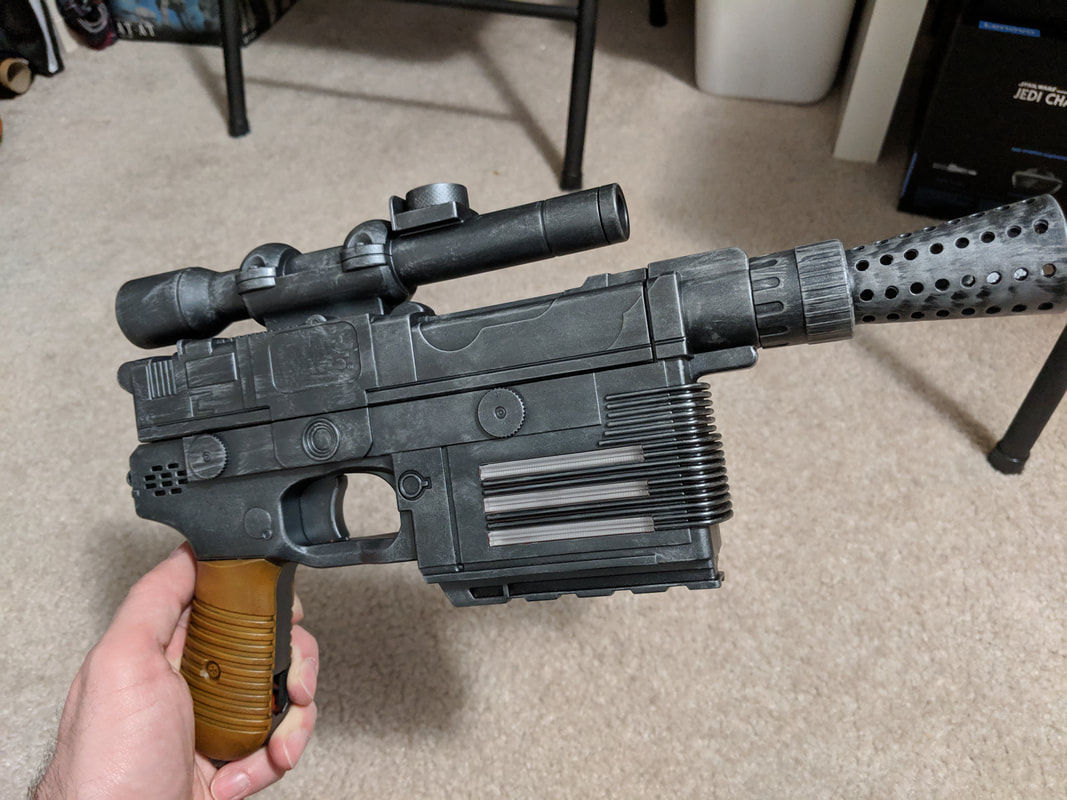
0 Comments
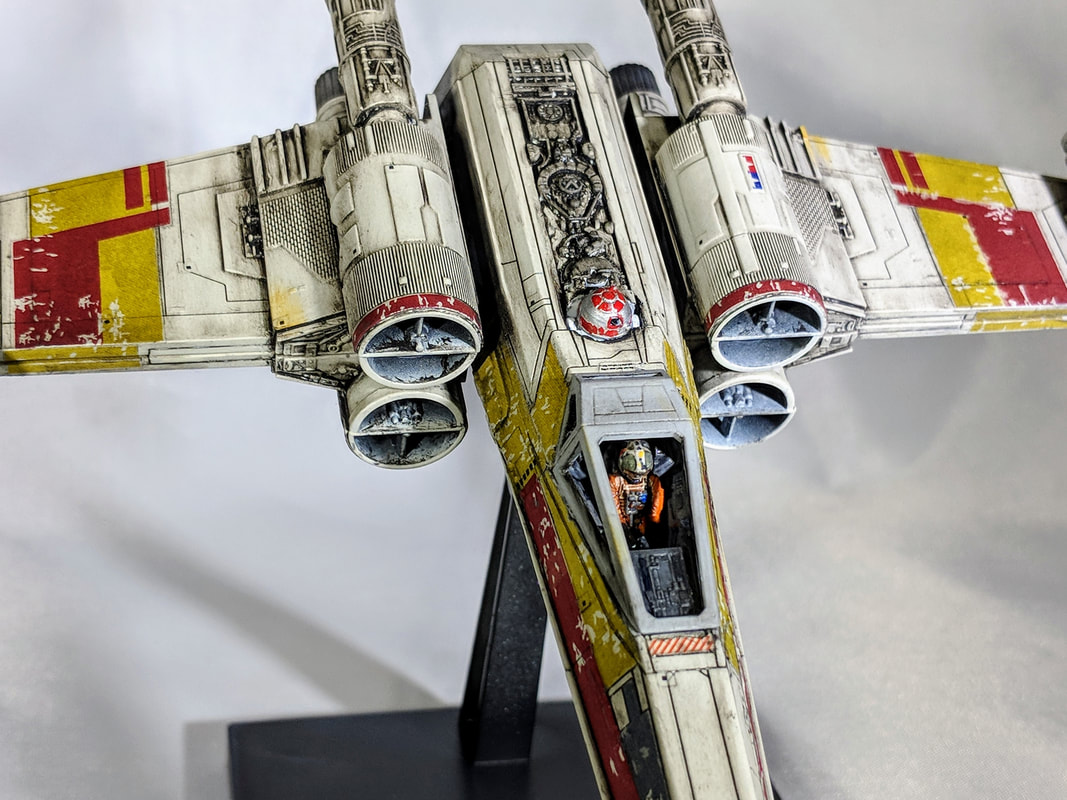
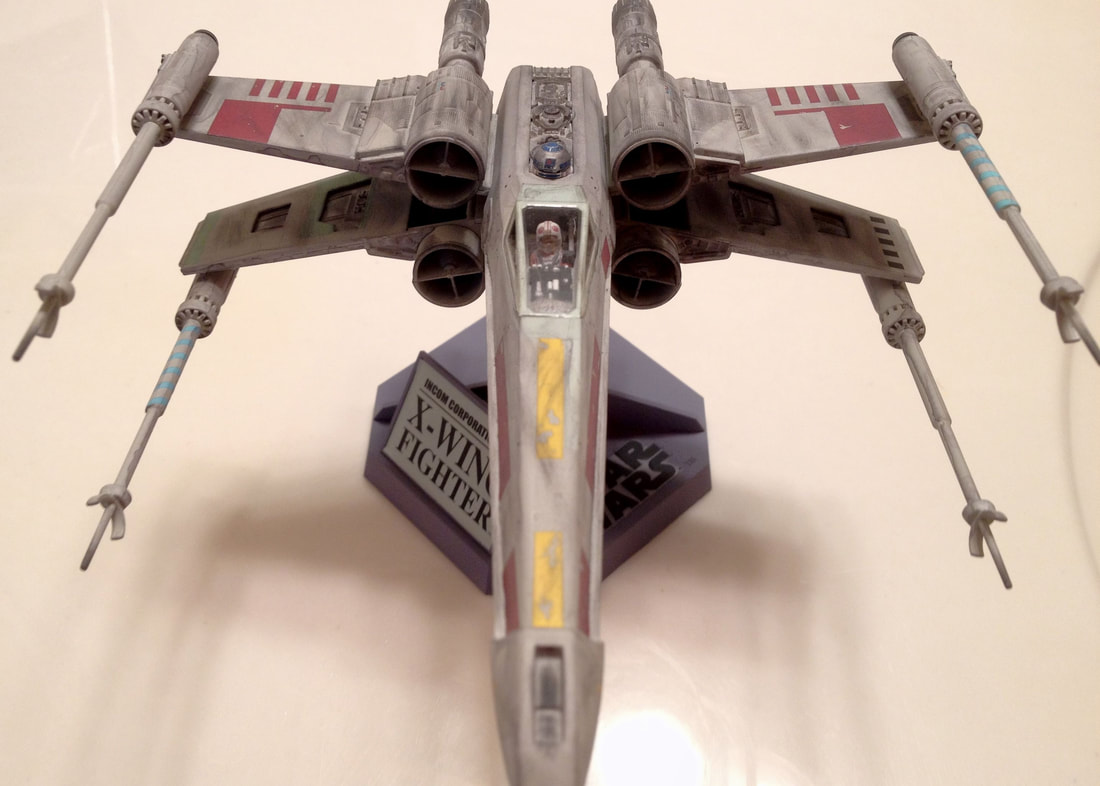
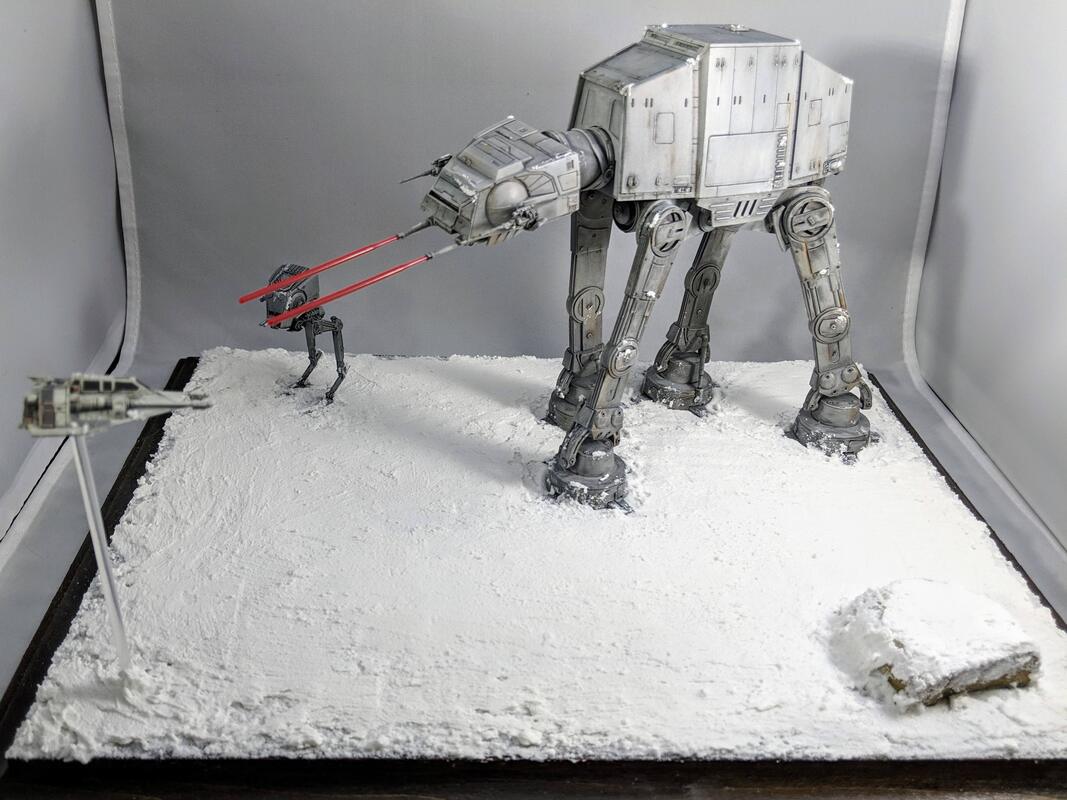 This past winter I got brave. I branched out and decided to build my first diorama. I had purchased the AT-AT model kit a while back and then found out that the Snowspeeder and AT-ST mini kits came in the same 1/144 scale. It was clearly a match made in heaven. I knew it was time to experiment with diorama building. Part of the reason I started with Hoth as a diorama subject was because of the straightforward appearance of snow. I knew I could get away with buying minimal new product and have to do little shaping for a decent result. I used Tamiya's Snow Effects products, which I would highly recommend. I used a bottle and a half of Snow Effects and about one bottle of the Powder Effects for the top layer. The surface of the diorama is about 12in x 18in. At the time I did not own any small spatulas, so I just used craft sticks. I would recommend the spatulas for easier application. 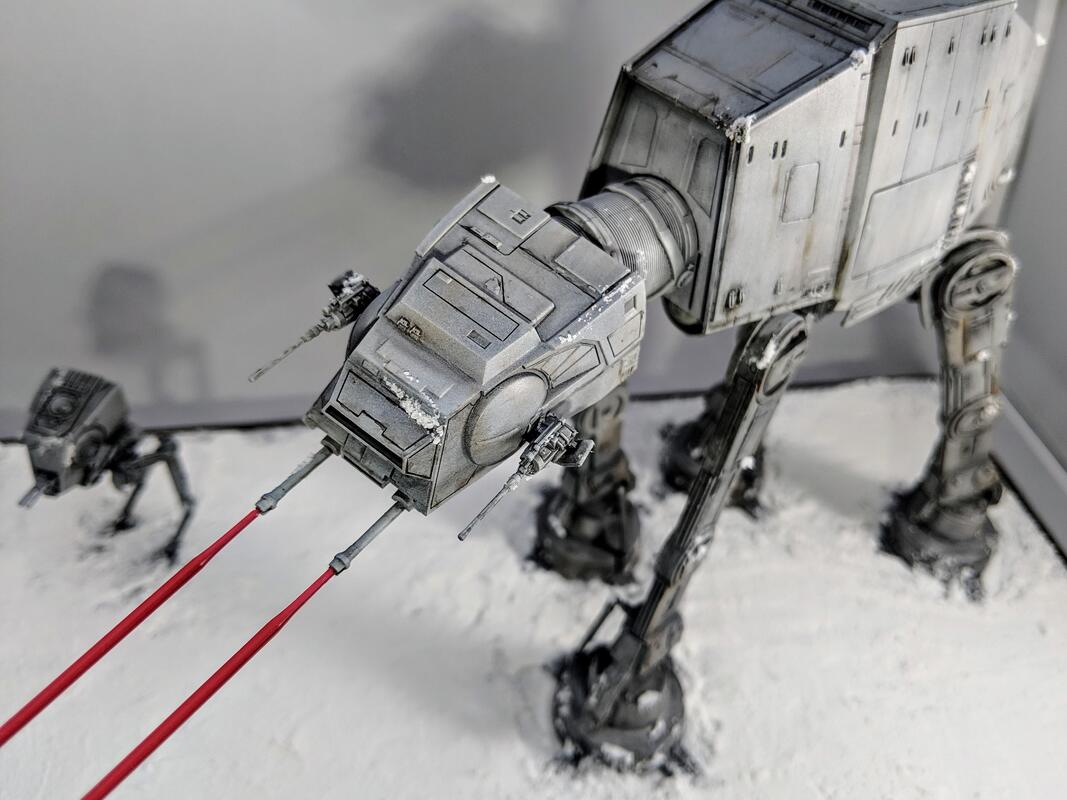 I based my diorama on the scene in Empire Strikes Back when the walker stops, sticks its back leg out, and shoots down a passing snowspeeder. I remember being surprised and impressed with that shot when I first saw the movie many years ago, and I thought it would make a great diorama scene. Thankfully the AT-AT model kit has great pose-ability, and I was able to stage a decent reproduction.  The model kits themselves were all great builds. The small Vehicle Model line of kits from Bandai make great diorama models, with an extra quick assembly time. I was most impressed with the ability to pose the walker in a variety of positions, including crashed. I have seen plenty of great builds with downed walkers from various other scale modellers. If I had an unlimited budget and space, I could see a nice Battle of Hoth diorama with multiple walkers and snowspeeders all over. No worries, however, because I am very happy with the results for this diorama. Check out the slideshow below for a few more pictures. 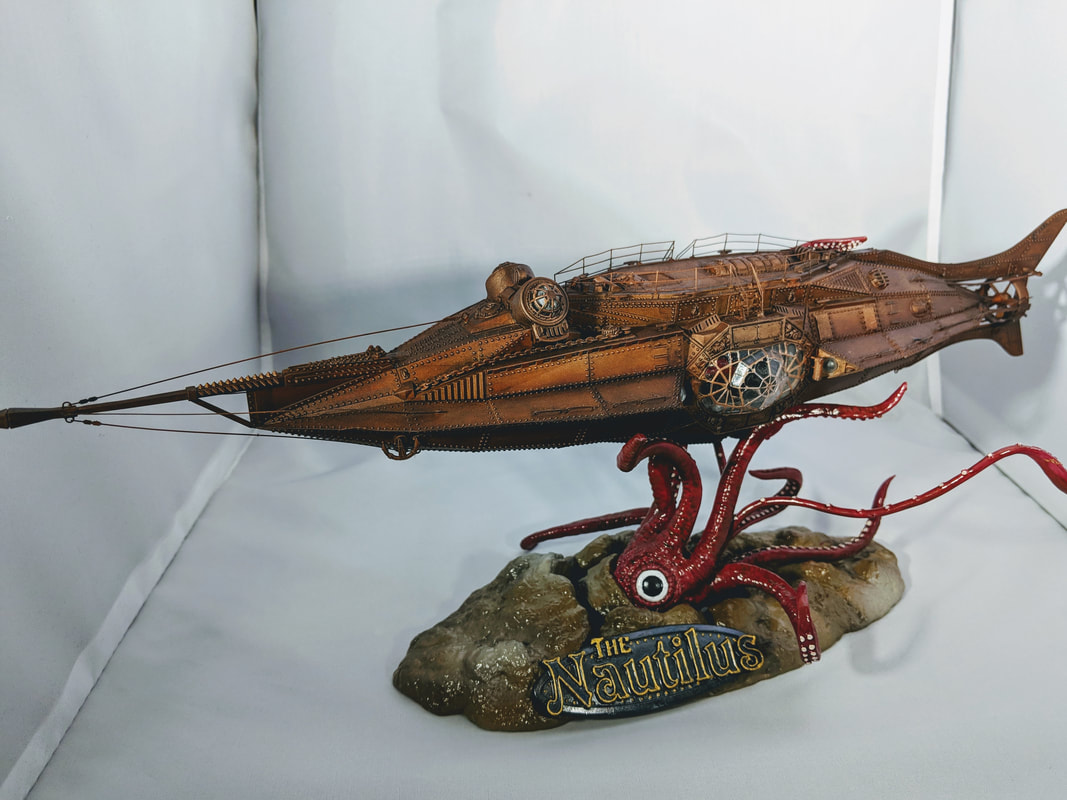 So, perhaps it is a small shock that I sometimes build non-Star Wars kits. Or, you noticed the header image on this page and have been wondering why I have a picture of a kit I have never written about. Or, you do not really pay that much attention and are wondering why I am even bothering writing an introduction like this. Wherever you stand, I cannot pass up the opportunity to talk about this fantastic Nautilus model kit from Pegasus Models. I have been a fan of Jules Verne and 20,000 Leagues Under the Sea since I read an abridged version as a young kid. I was equally fascinated and terrified by the giant squid and the underwater adventures of Captain Nemo. I received this kit a couple years ago as a Christmas gift and was putting it off for a while because I did not have a plan for the paint job. I started it last summer and finished it in the fall. 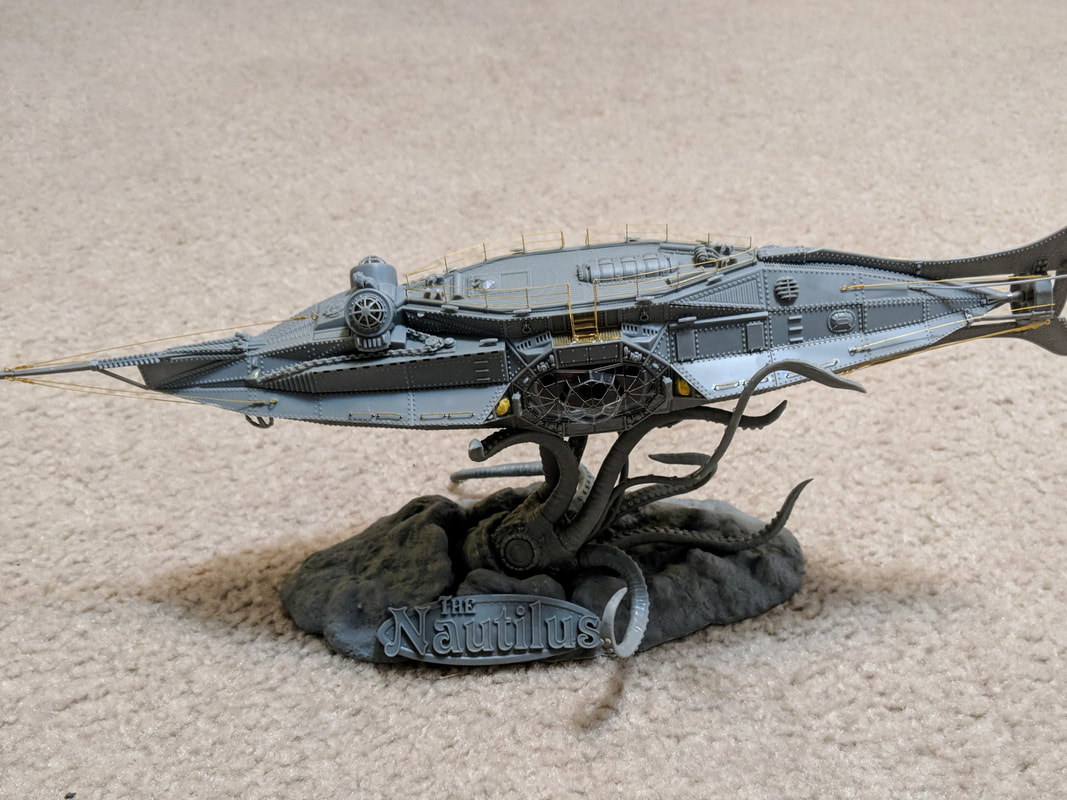 I normally do not share work in progress photos on here, but I like this shot because it provides a good view of the different parts of the kit. The base is resin and the kit comes packaged with photoetch parts for the handrails, ladders, and lines. More on the photoetch later. 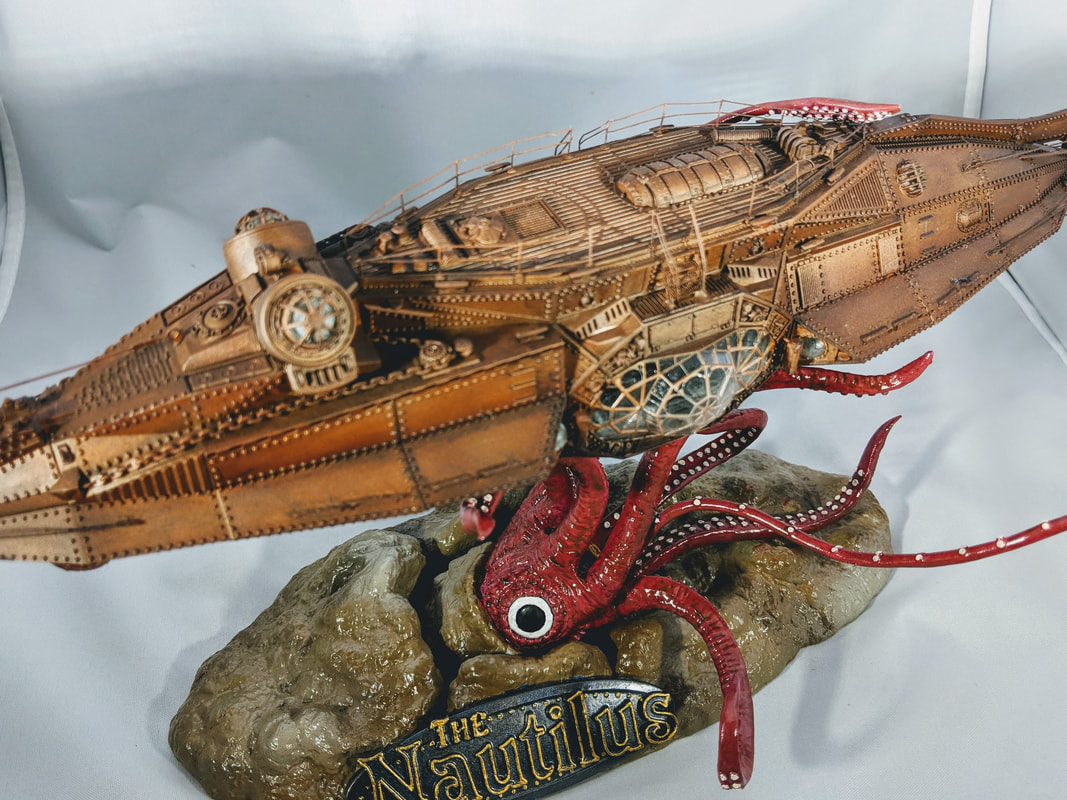 The most important part of this build in my mind was the paint job. I spent some time researching other people's builds and saw that no two were the same, which gave me some freedom to play a little. For the base I did some airbrushing with stone gray and dark earth to create the mottled sea floor. The squid is a mixture of pink and red with a dark brown wash. Finally, I started the ship itself with some pre-shading, then covered the whole thing with various light coats of metallic copper and burnt umber. I then went back and further darkened some of the spots with more burnt umber. I was very happy with the final result, as it has a steam punk, Victorian aesthetic that works well with the original novel. 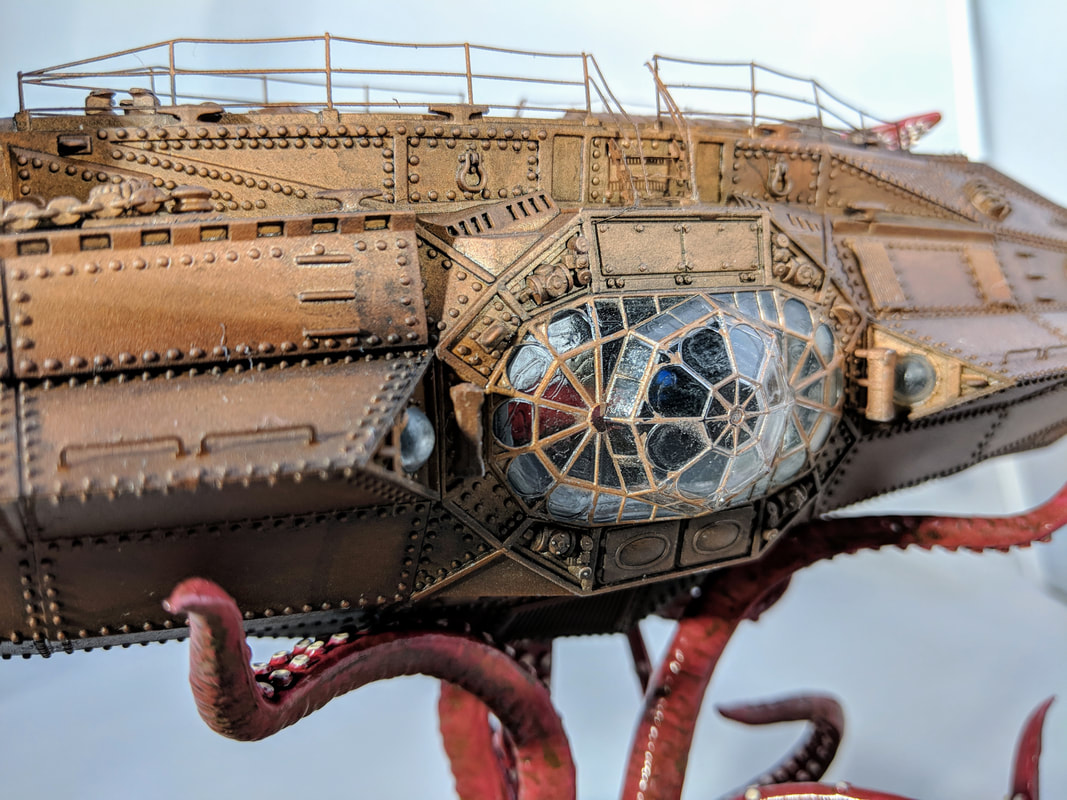 The two most annoying parts of the kit were the windows and the photoetch parts. The windows are tiny, and the included masks work decently well, but some of the window parts are too small to really fit any mask. Then, you have the issue of residue from the tape left on the clear parts. I imagine there are some aftermarket masks that might work better than the provided ones. As for the photoetch, I think I mostly need more practice. The railing is super thin and easily bent, and I had several moments of frustration trying to position them correctly. I was able to rehab one of the bent rails to fit with the squid tentacle crushing the ship, so my frustrations ultimately worked out. 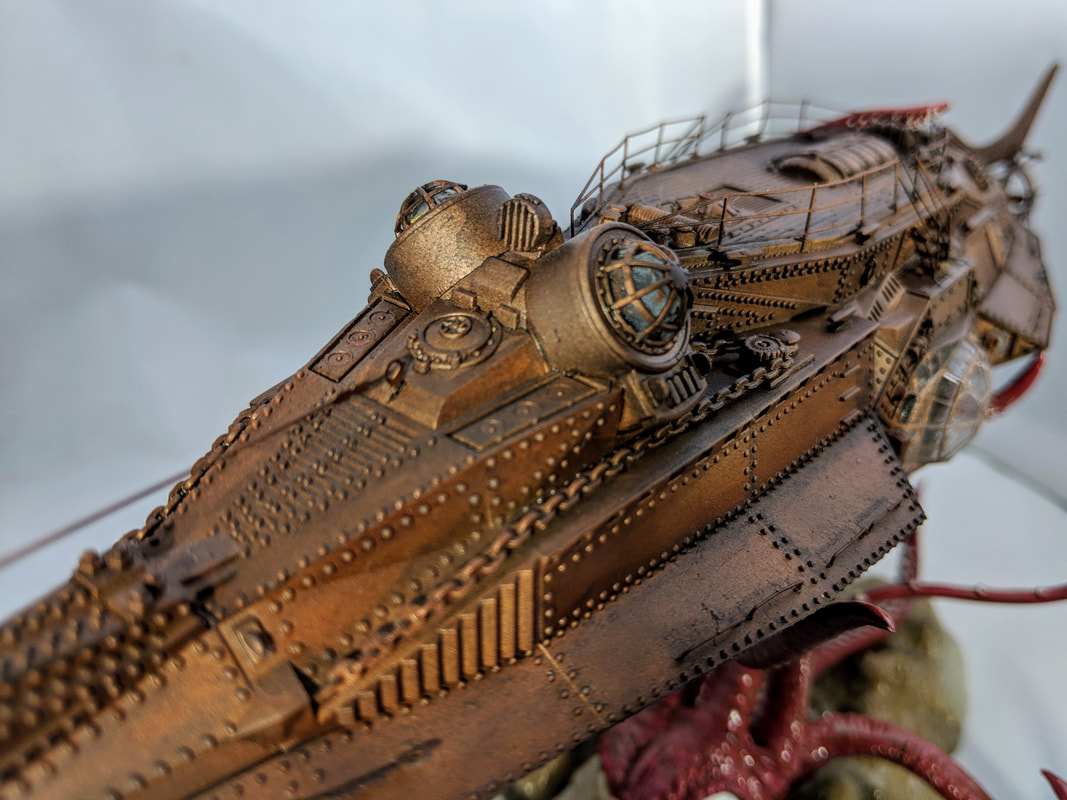 This is a must-buy kit for all the detail, the unique stand, and the bonus photoetch and masks included in the box. In addition, Captain Nemo's salon is included for painting, although it is barely visible through the windows. Pick one up wherever you can find it! 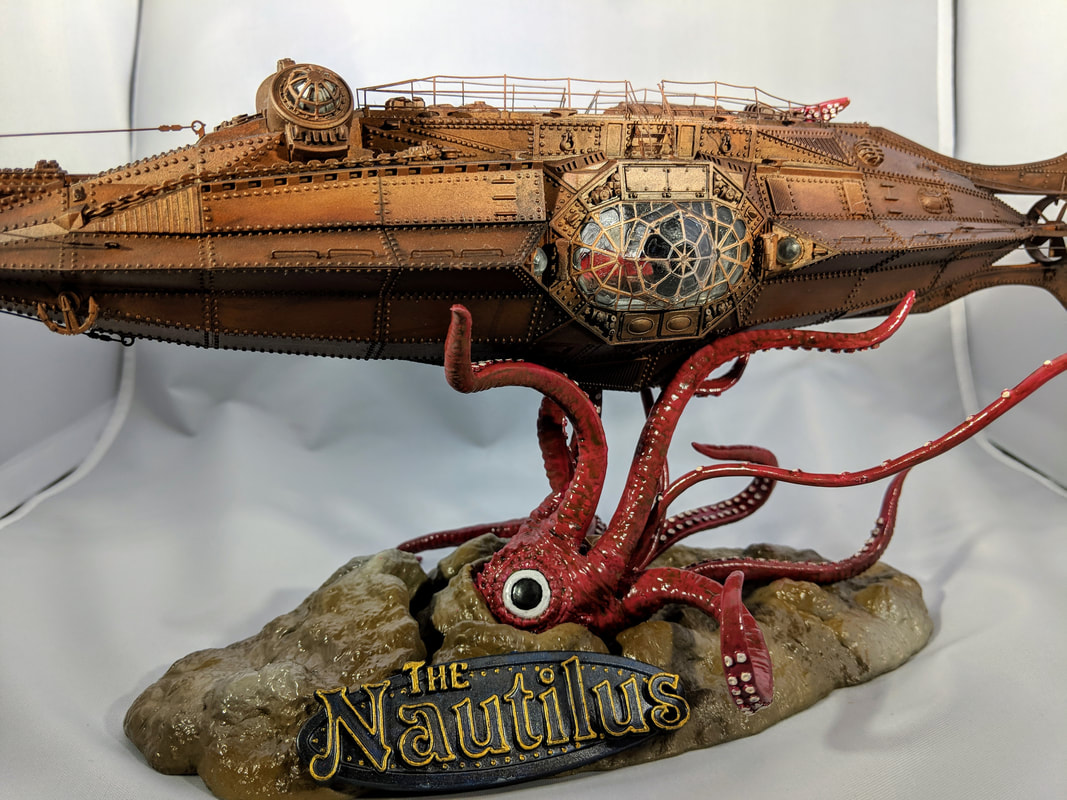 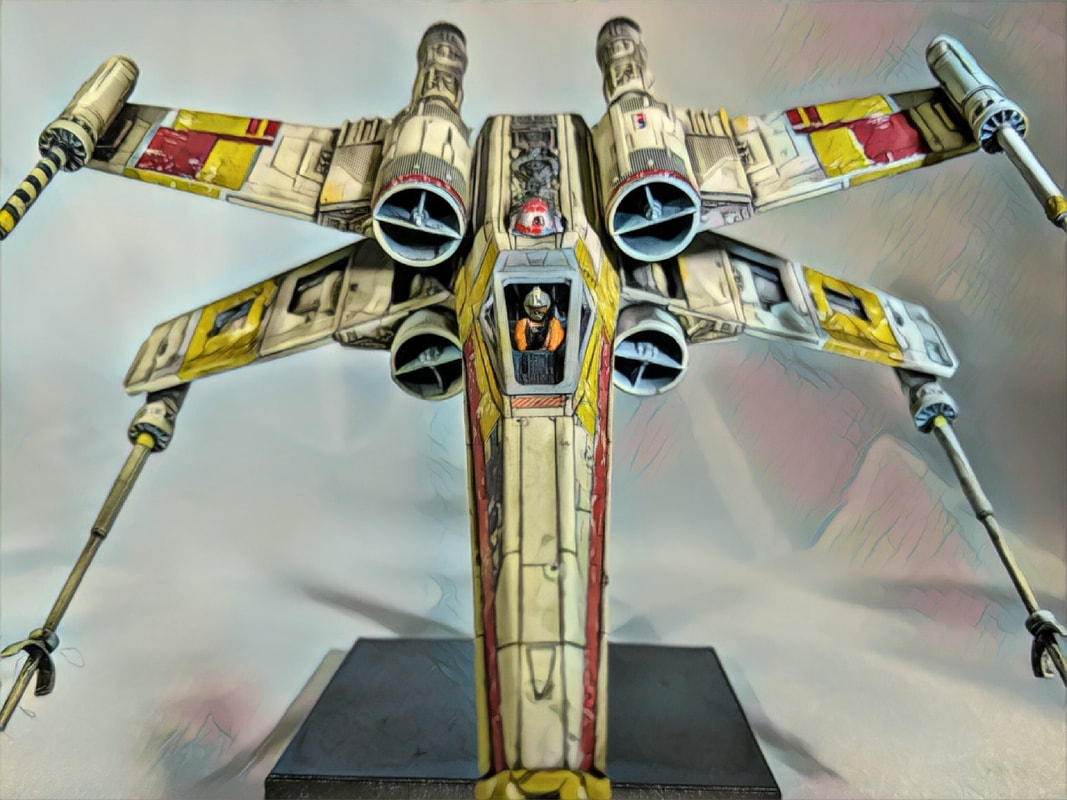 As I continue to play catch up with completed builds, the next one up is the Bandai 1/72 X-Wing kit. As I was scrolling through my past pictures I noticed that I took these photos almost exactly one year ago, so it seemed only appropriate to relive it now. I bought this X-Wing kit as part of a two-pack box in conjunction with Rogue One, which included a 1/72 scale X-Wing and a 1/144 scale X-Wing. You will see the 1/144 X-Wing pop up later, but for now I want to spend some time on the 1/72 kit. The provided livery and decals were for Red Leader from the assault on Scarif, but I have always been a Wedge Antilles fan so I really wanted to build his X-Wing. Thankfully, there are a lot of great custom decal makers in the world of the internet, and I found a good set of Red 2 decals from Cosmos Models (he makes a lot of really great decal sets for many different Star Wars ships. I will plug him all day long; his Instagram handle is @nicholas_sagan).
 Outside of hunting for reference photos, this kit was fun and easy to build. I used a slightly gray tinted white for the base color, custom decals for Wedge's colors, and an oil wash with Starship Filth for the panel lines and dirty look. I am very happy with the final result on this kit, so much so that the old one got bumped to the land of storage. 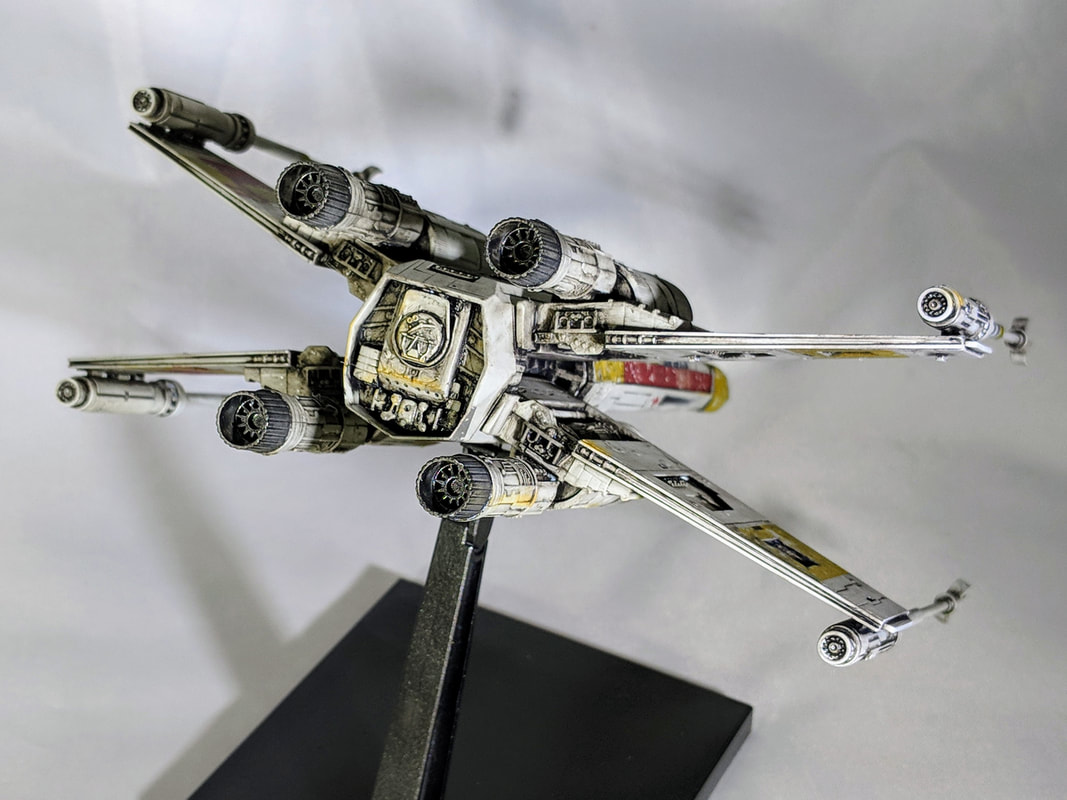 Stay tuned for more on that other tiny little X-Wing that came in the box with this one!
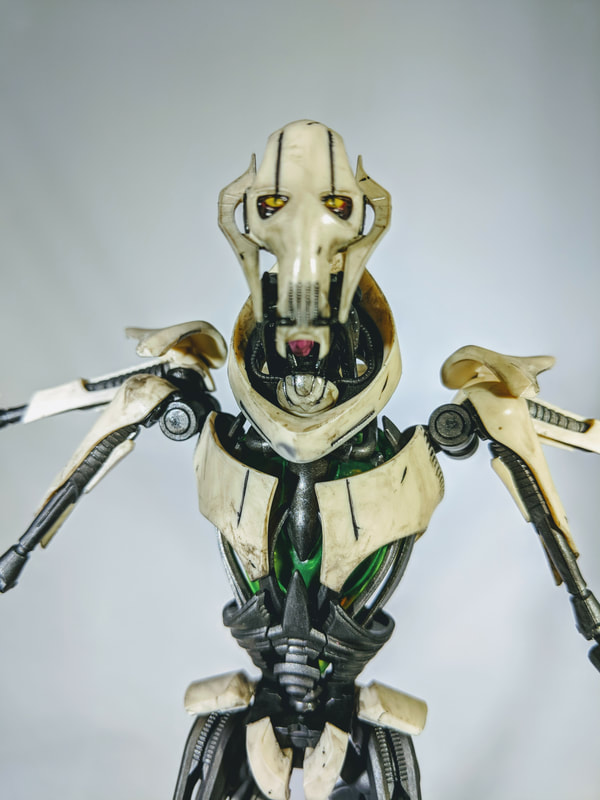
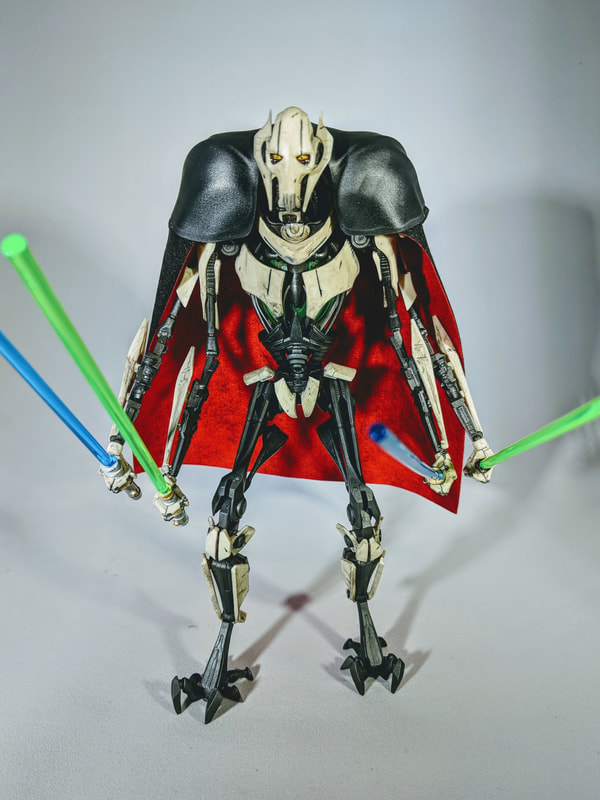
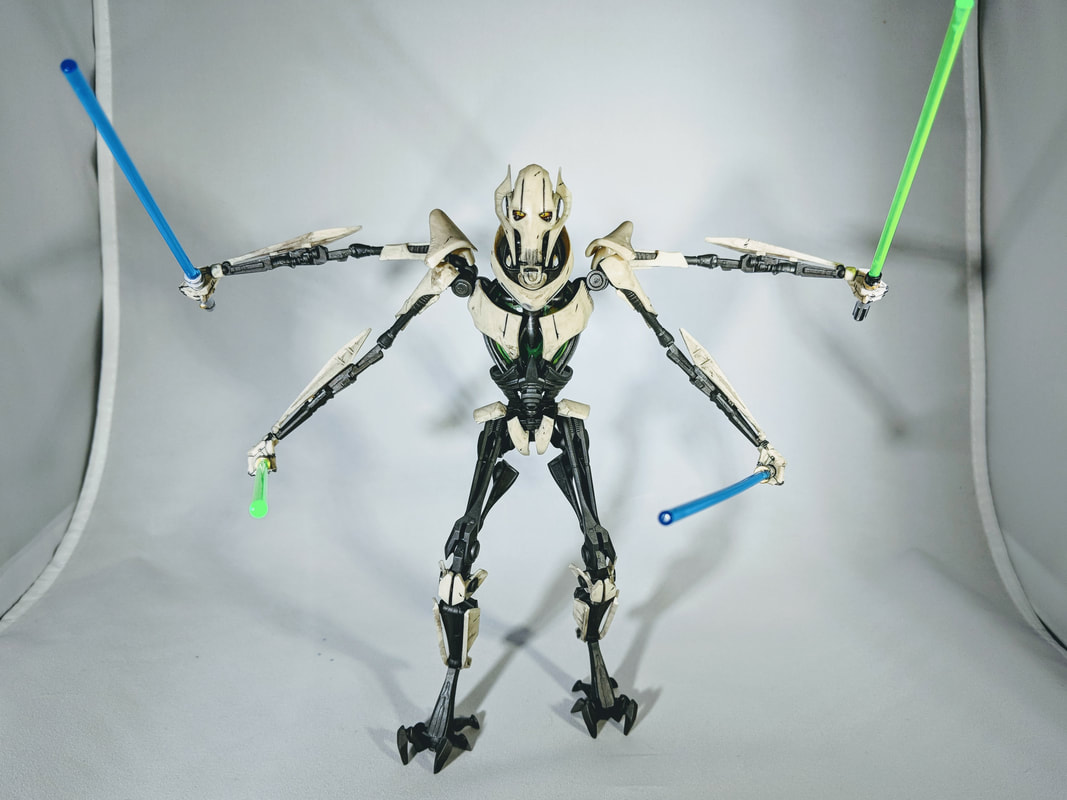 After my last Battle Droid build, I kept the prequel bug going and picked up this amazing General Grievous figure kit. I had seen many people build this on YouTube and Instagram and heard many good things about it. In addition, there was at that time a distinct lack of Grievous action figures on the market in this scale. Since then, several more have been released, but based on what I have seen, this figure beats them all by a mile.
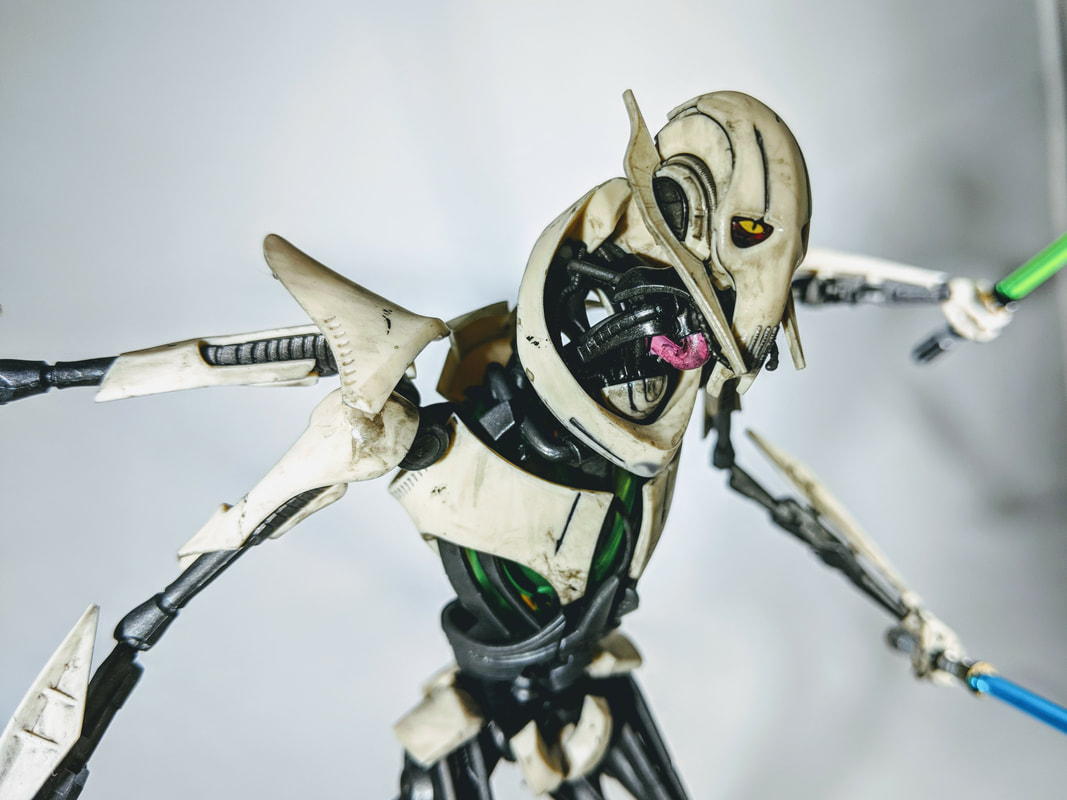 My favorite display option, however, which you can probably tell from the number of pictures, is all four arms out, a lightsaber in each hand. This is Grievous' most intimidating and iconic pose in my opinion, plus it gives a great chance to showcase all four lightsabers that come with the kit. Be prepared to do a little paint work on the lightsabers if you want them to look authentic. For weathering I used a combination of Gundam markers for the narrow cracks and an overall dark grey wash to dirty him up a bit. In addition I did some gunmetal drybrushing on the darker under parts. I was pretty happy with the results. Enjoy the slideshow of the rest of my pictures below! This has definitely been my favorite figure kit from Bandai so far!  Besides building Star Wars models, I am a huge fan of the X-Wing miniatures table top game. I am not into the tournament circuit, but I like collecting the ships and playing casually every couple of months. A while back I stumbled across some research about magnetizing your X-wing ships to create the ability to bank and turn your ship on the stand. The idea intrigued me, but I never made the commitment to doing it. For whatever reason, I decided about a month ago that it was time. The process was quite easy, and I will just direct you to the K&J Electronics tutorial where I both learned how to do it and bought all the magnets. I followed their instructions, but I used super glue instead of hot glue. Small Ships See this great tutorial from K&J Electronics. Here are a couple of additional thoughts. Note about the glue: Super glue worked well for attaching the magnets to the ships, but was much more difficult when attaching the steel ball to the plastic stand. I went through many frustrating attempts trying to hold the ball onto the stand with it sliding off and ruining the surface of the steel ball. I would recommend hot glue for the steel balls rather than super glue. Note about the bigger small ships: I did find that some of the small ships like the Sheathipede shuttle needed a slightly bigger steel ball to match the ship's weight. I used the 1/4" steel ball (NSB4) for these slightly bigger ships, and it worked perfectly. I would recommend making some small/medium ship plastic tube stands to use with your heavier small ships.  Some of the bigger ships required some creative magnet placement. Big Ships The tutorial linked above did not address much about the bigger ships beyond a suggestion about the size of ring magnets and steel balls. The size suggestion is perfect, although I would recommend making a few with the 3/8" countersunk ring magnet and the 1/2" diameter steel ball, which is one size bigger than K&J's initial recommendation. A few of the newer ships (I'm thinking mainly of the Shadowcaster) are heavier and need a little stronger support. The biggest challenge with some of the larger ships is the placement of the original stand connector. Above, you can see the YT-2400 required a magnet placed diagonally to maintain the weight balance of the ship when attached to the base.  The other ship with which I faced the biggest challenge was the Slave 1. The original stand connector is placed up inside the ship so it can fly vertically, like in the films. The magnets were not going to fit there so I made the call to glue the magnet to the back. You can see the result above. The bonus of this placement is that you can rotate the ship into its landing position, if you feel so inclined.
I have yet to play a round with my magnetized ships, and I still have most of the scum ships to finish, but I really like the final result of the magnets, and I would highly recommend it to anyone who feels up to it. The process is not hard at all and looks to be visually rewarding. Feel free to leave any questions in the comments or share some tips of your own! Twenty years ago (crazy!) The Phantom Menace marketing machine was hitting pop culture like a tsunami. The first piece of merchandise I remember associated with the movie was the release of the Battle Droid and STAP action figure. I was so excited to go to the store to buy a new Star Wars toy in conjunction with a new Star Wars movie release for the first time in my life. Regardless of opinions about The Phantom Menace, I still have a strong nostalgic connection to this original toy. I think I still even have it in storage somewhere.
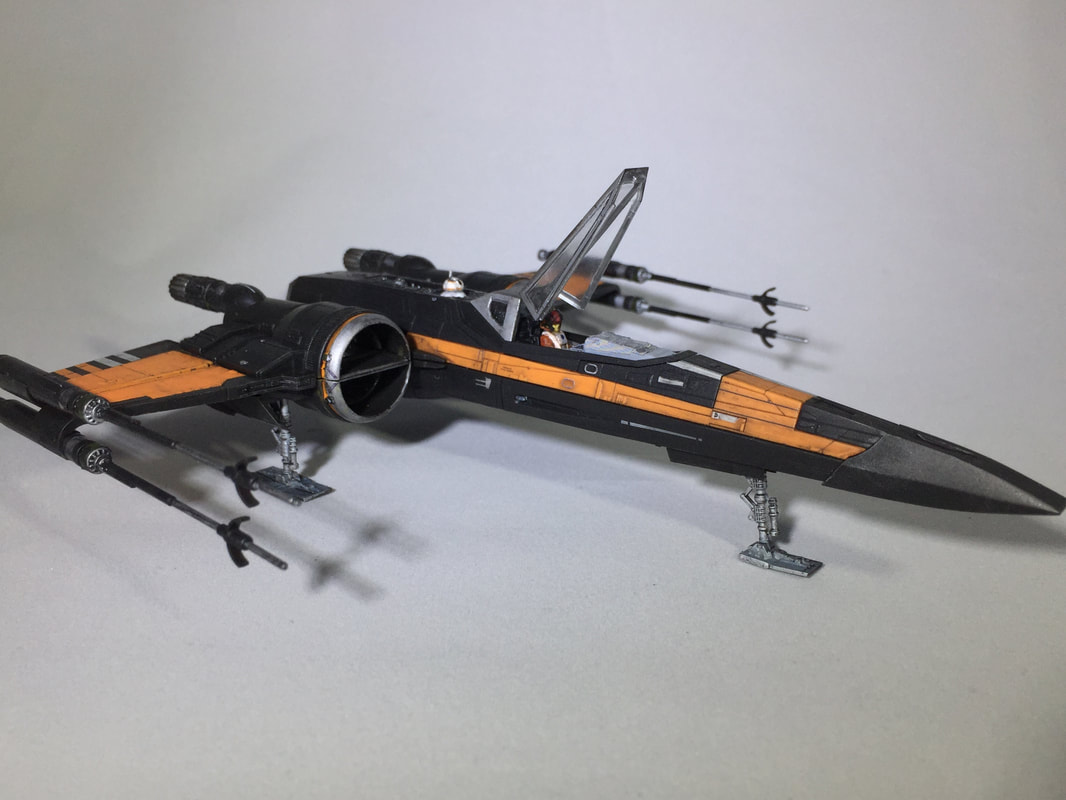
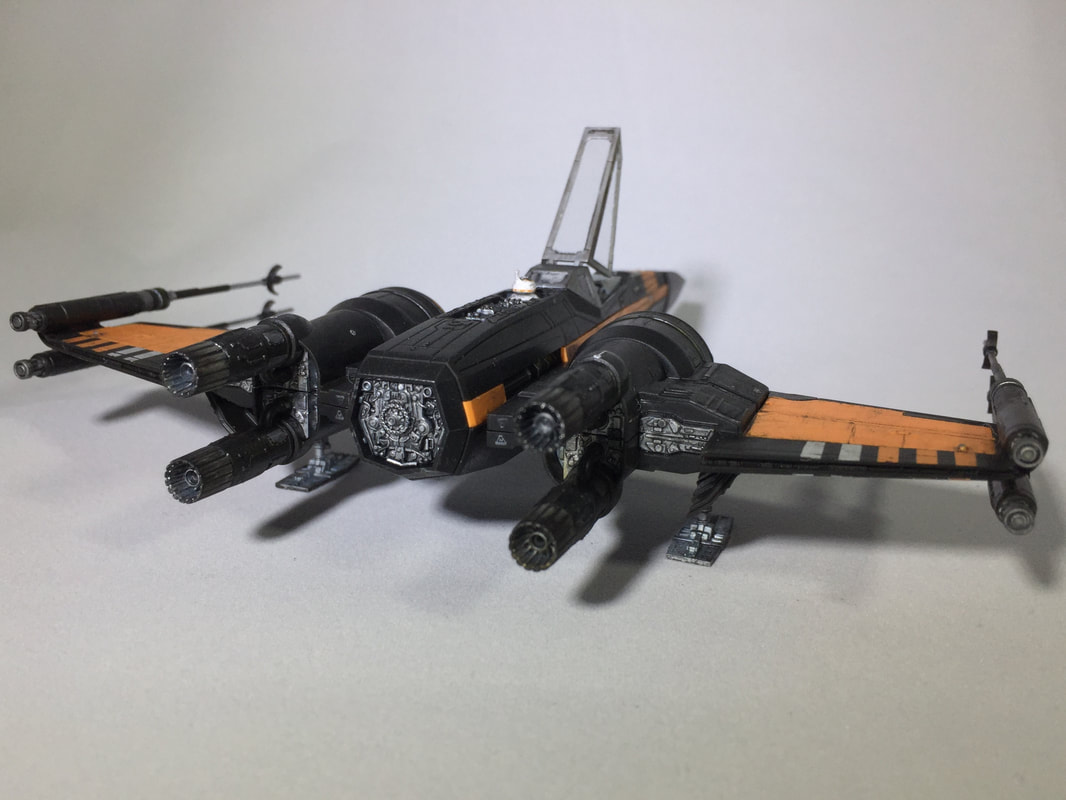
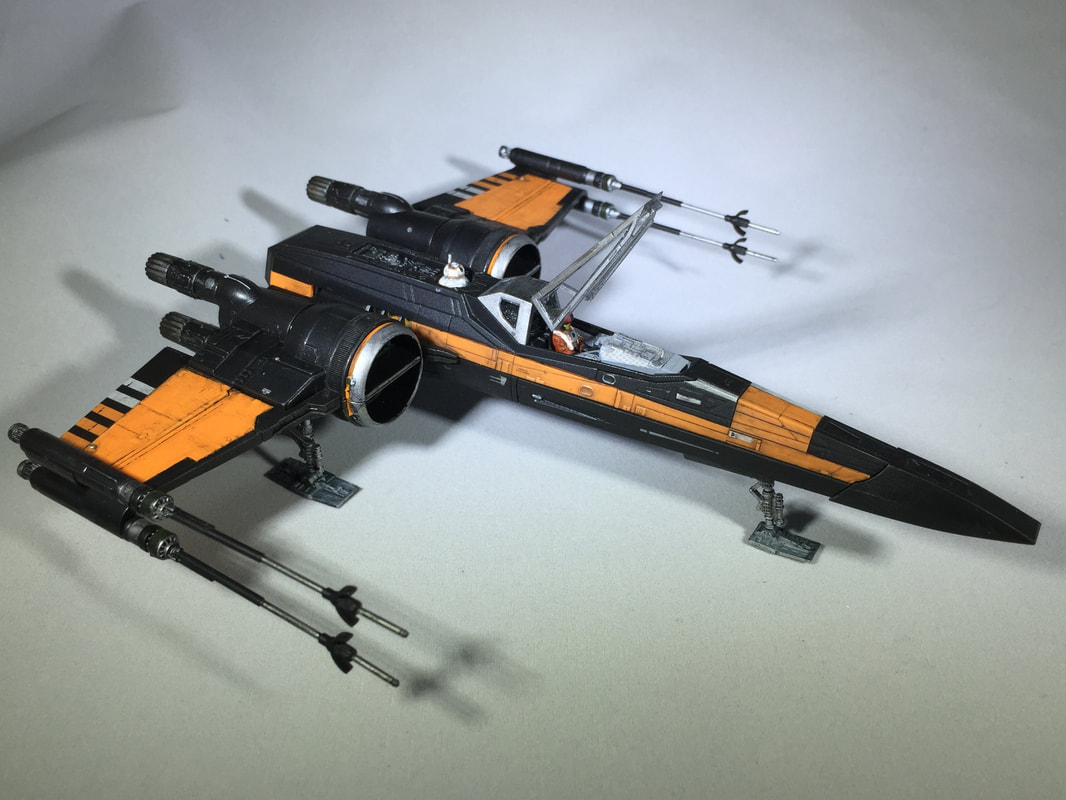
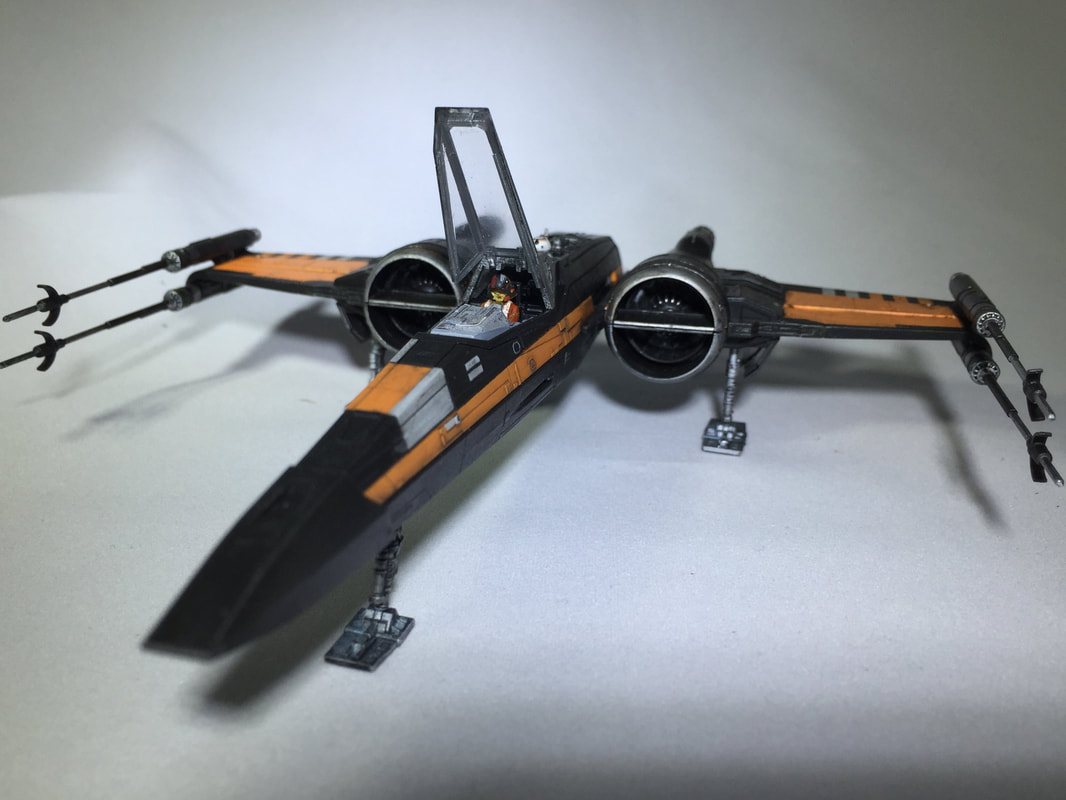
Needless to say, when Bandai made a model kit of the Battle Droid figure and it came with the STAP bike, I was very excited. Nostalgia and model building all in one! Plus, the Bandai model figures are the best way to build and collect action figures. For the Battle Droid figure I tried a method I have used before in which I painted a silver enamel base with a layer of acrylic on top so I could add some chipping. For this kit, I probably should have just left the molded color and added some silver chipping effects with paint. I had a lot of issues with the various layers thinning and discoloring more than I would have liked (probably because I got impatient), but I was able to salvage it as an extra battle-worn droid. After finishing the droid and experiencing some of the difficulties, I kept the molded color for the STAP and weathered it with small silver scratch marks and Tamiya weathering powder. A couple of flat clear coats and it was done. This Battle Droid can also be posed separately and in its collapsed form, but I have such a strong connection to the STAP combo that I probably won't ever change it up. This was an absolutely amazing model kit. I wish I could say that every time I build a model kit, everything is joyous, fun, easy, and super rewarding. Usually it is. Last year, however, I finished a model kit that had occupied almost a year of my life and left me feeling extreme amounts of frustration. That kit was the Swedish Vasa made by Revell. Occasionally, I branch out from Star Wars, and when I do, it usually is because of some personal connection to the build. Many years ago, my family visited Stockholm and the museum that houses the Vasa, a doomed and ill-constructed Swedish warship that sank in the harbor on its maiden voyage. In person, the ship is absolutely incredible. Preservationists were able to salvage almost the entire ship, and it is housed in its entirety in a beautiful museum in Stockholm. With that personal experience in mind, I was excited about building my own version of the infamous ship and adding it to my collection. I should have recognized some warning signs. I have previously built two naval ship models, a Roman warship and a Viking longship. Both times after finishing those I vowed never to build a naval ship again. Rigging with tiny thread is a nightmare. Apparently, I am a glutton for punishment. To make a long story short, I had so many issues with building this model kit. There were a lot of issues with parts not fitting well, and all of the tiny human figurine details that make up the elaborately carved decorations around the ship looked like a bunch of mushy blobs with legs. Needless to say, this made detail painting difficult. For long stretches of time, I would just let this model sit because I had no desire to bang my head in frustration. Finally, however, I determined to finish it and put the specter of frustration to the side. I did minimal rigging so that I would not lose my mind over the extensive network of tiny threads, finished off the paint job, and dirtied up the sails a bit. The result is not terrible. Check out the slideshow and make a judgment for yourself, while I say good riddance to this model kit. Poe Dameron's X-Wing is definitely a unique take on the classic X-Wing design. The kit pictured above is the first version of the ship made by Bandai from the release of The Force Awakens in theaters. For the release of The Last Jedi, Bandai rereleased the kit with a small engine part on the back.
As with most Bandai model kits, the assembly is very straightforward and well-designed. The biggest issue I had was with the decals for the wing, which I had on the previous Blue Squadron X-Wing also. I could not use enough decal set to make them lay well, and I know a lot of other builders who have expressed similar issues. I ended up masking and painting the orange with much trial and error to get the correct color. Without going into all the frustrations, I had a lot of issues with the wrong color mix or an incorrect thinner ratio until I finally found a mix that worked and laid well on the plastic. I also made the call to go with landing gear out for this build because I have done several X-Wings in flight mode. I imagine Poe has just hopped into the cockpit and is ready to head out to take on the First Order. |
AuthorModel builder, board gamer, and all around lover of small scale stuff. Archives
March 2021
Categories
All
|
 RSS Feed